Download and Install
1.Open the Insta360 website and head to the download page. Click on any 360º camera and scroll down to download the Insta360 Reframe plug-in. The plug-in is available for 2021 and above versions of Adobe Premiere.
Choose the correct version according to your computer's operating system. Once downloaded, follow the on-screen steps to complete the installation.
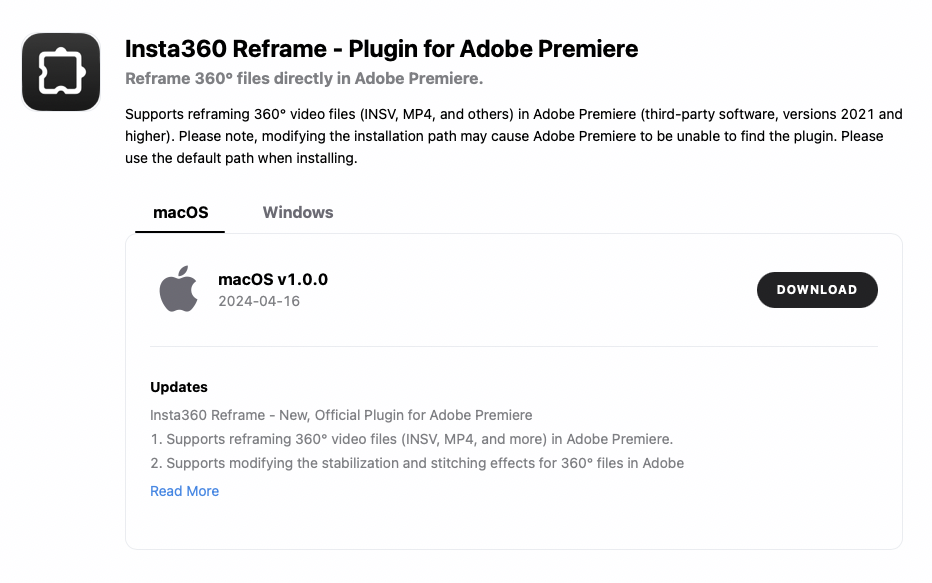
The Insta360 Reframe plug-in is also included when you download Insta360 Studio. If you download Studio, tick the Insta360 Reframe plug-in option to install them at the same time.
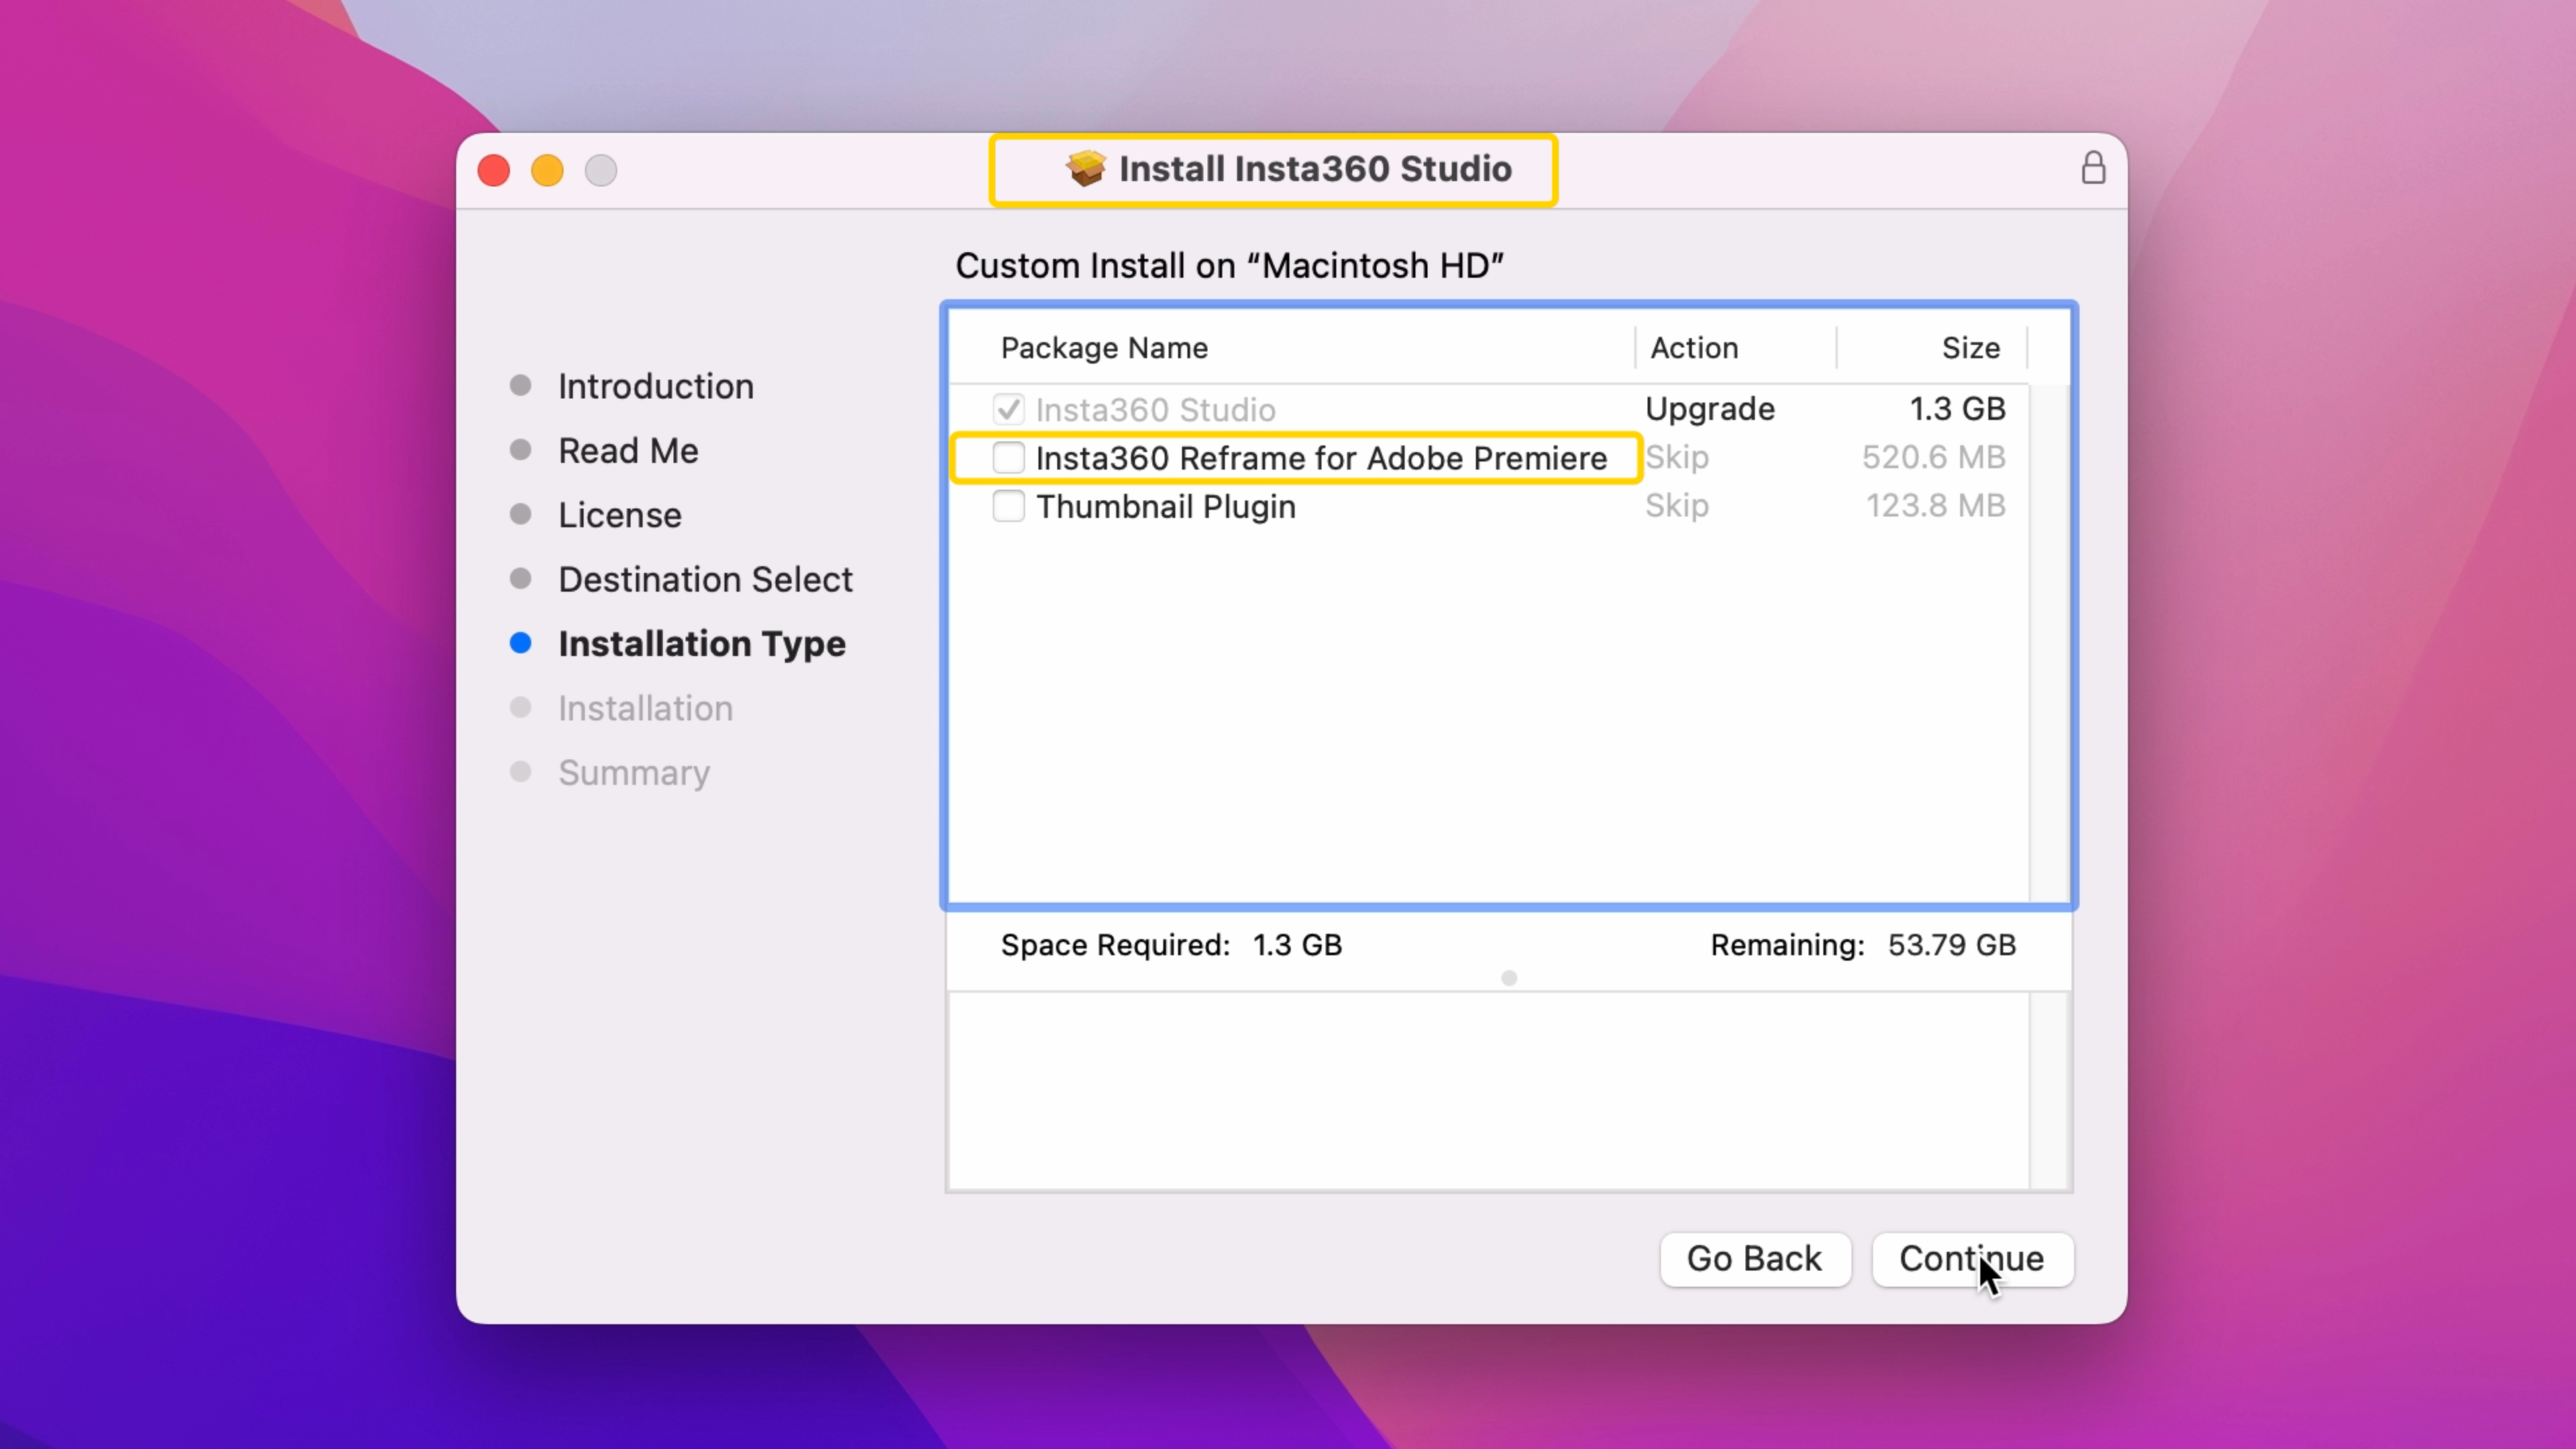
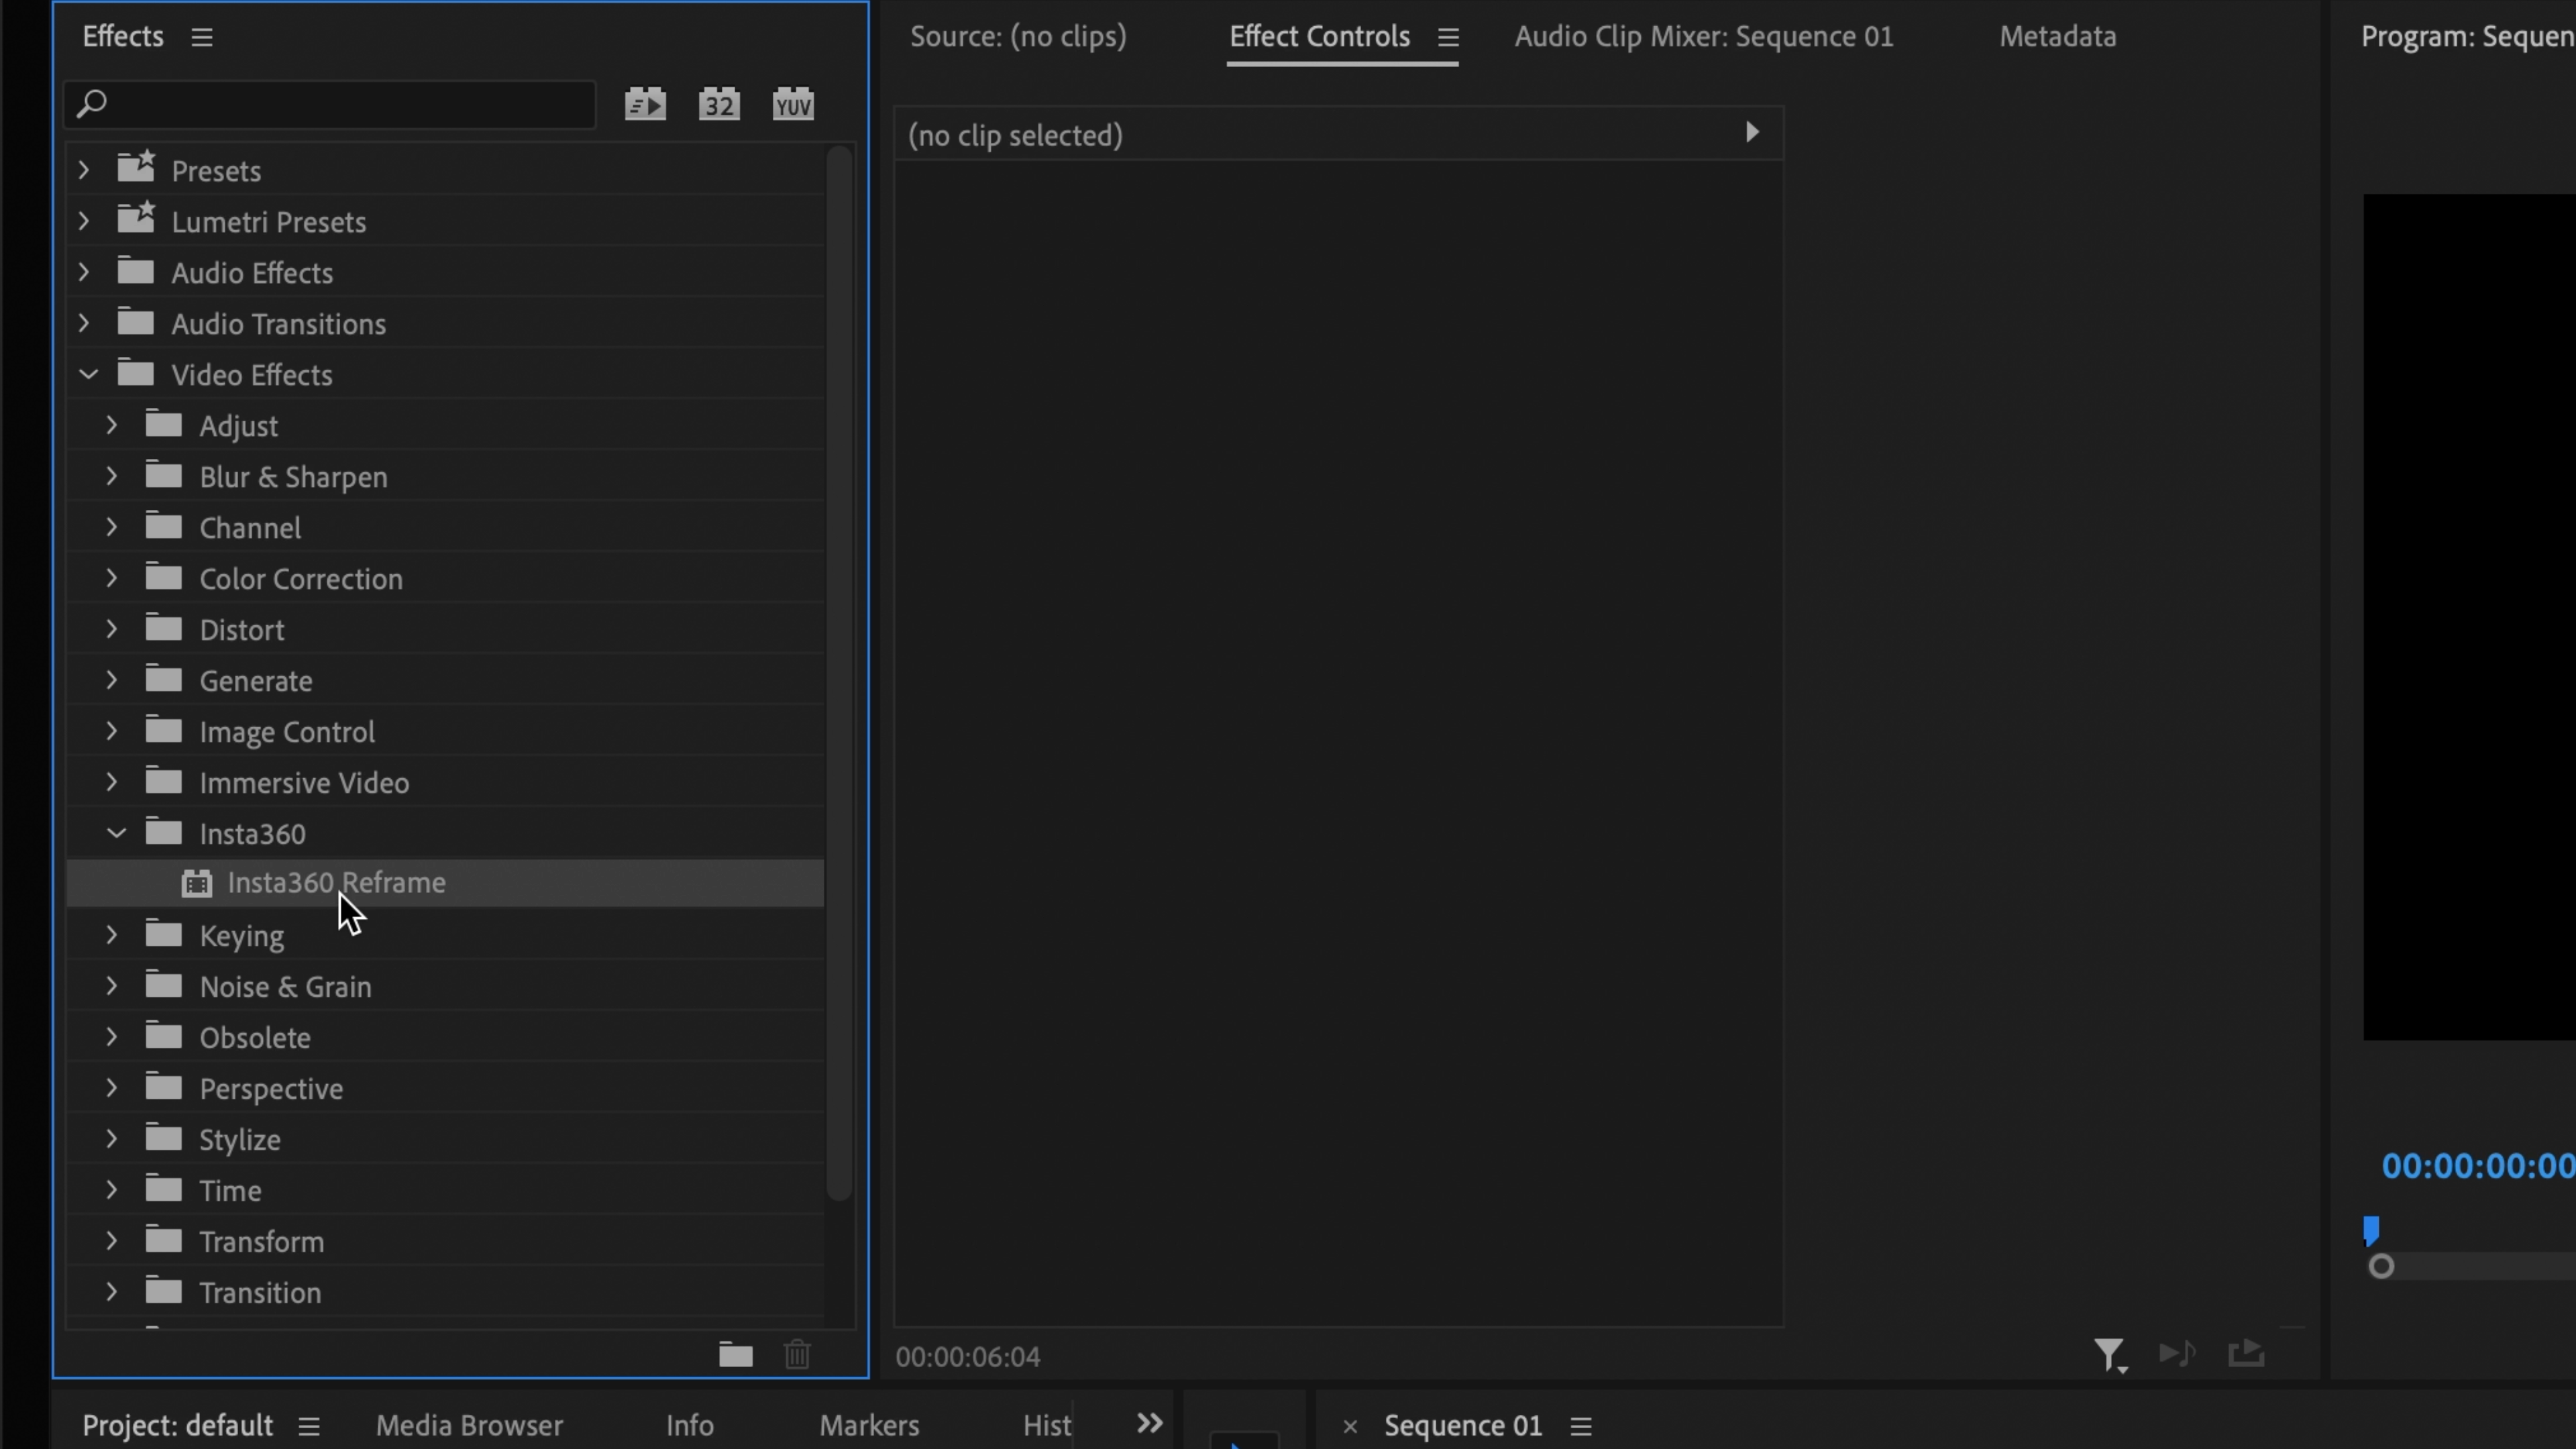
2.Once installed, open Adobe Premiere Pro, click Video Effects and go to the effects panel. If Insta360 Reframe has been successfully installed, you will see it.
Import 360º Files
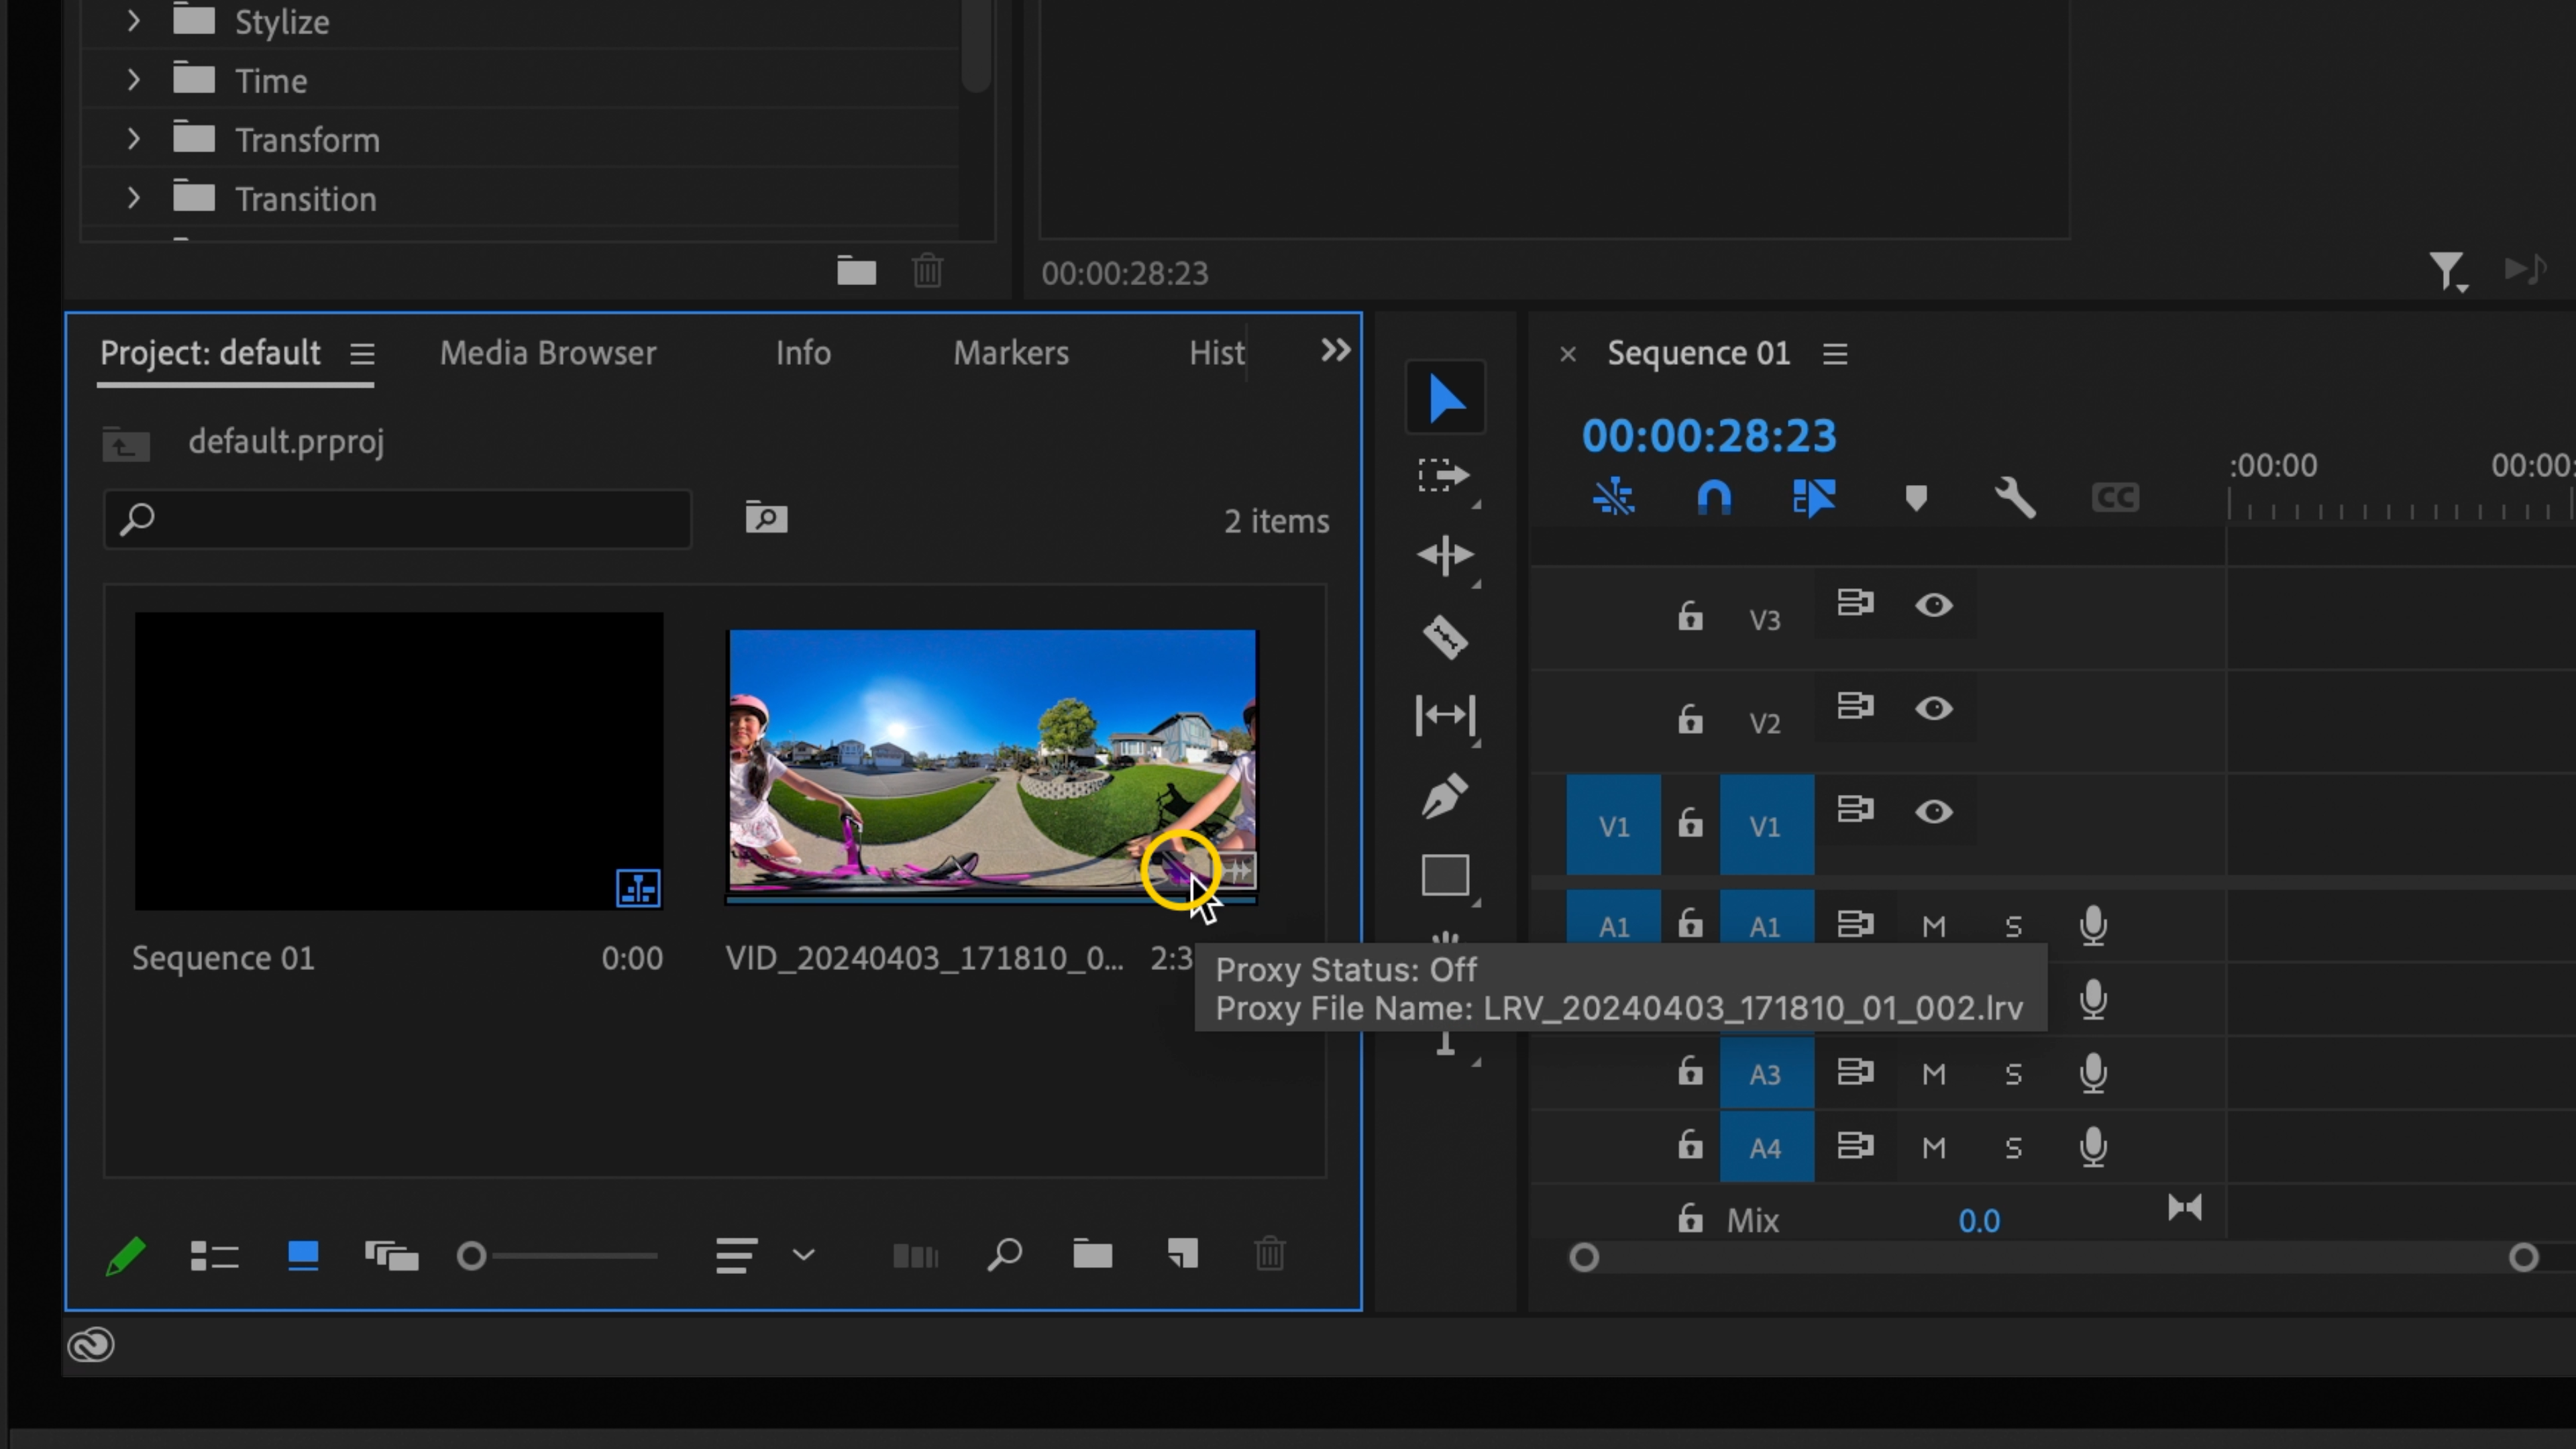
In the 360º camera folder, you will see the original insv file and the low-resolution lrv proxy file. Please keep the file names the same and make sure they are in the same folder.
1.Import the insv file into the project. The plug-in will automatically import the proxy lrv file. Add the insv file into the sequence. The monitor will show the unframed 360º video.
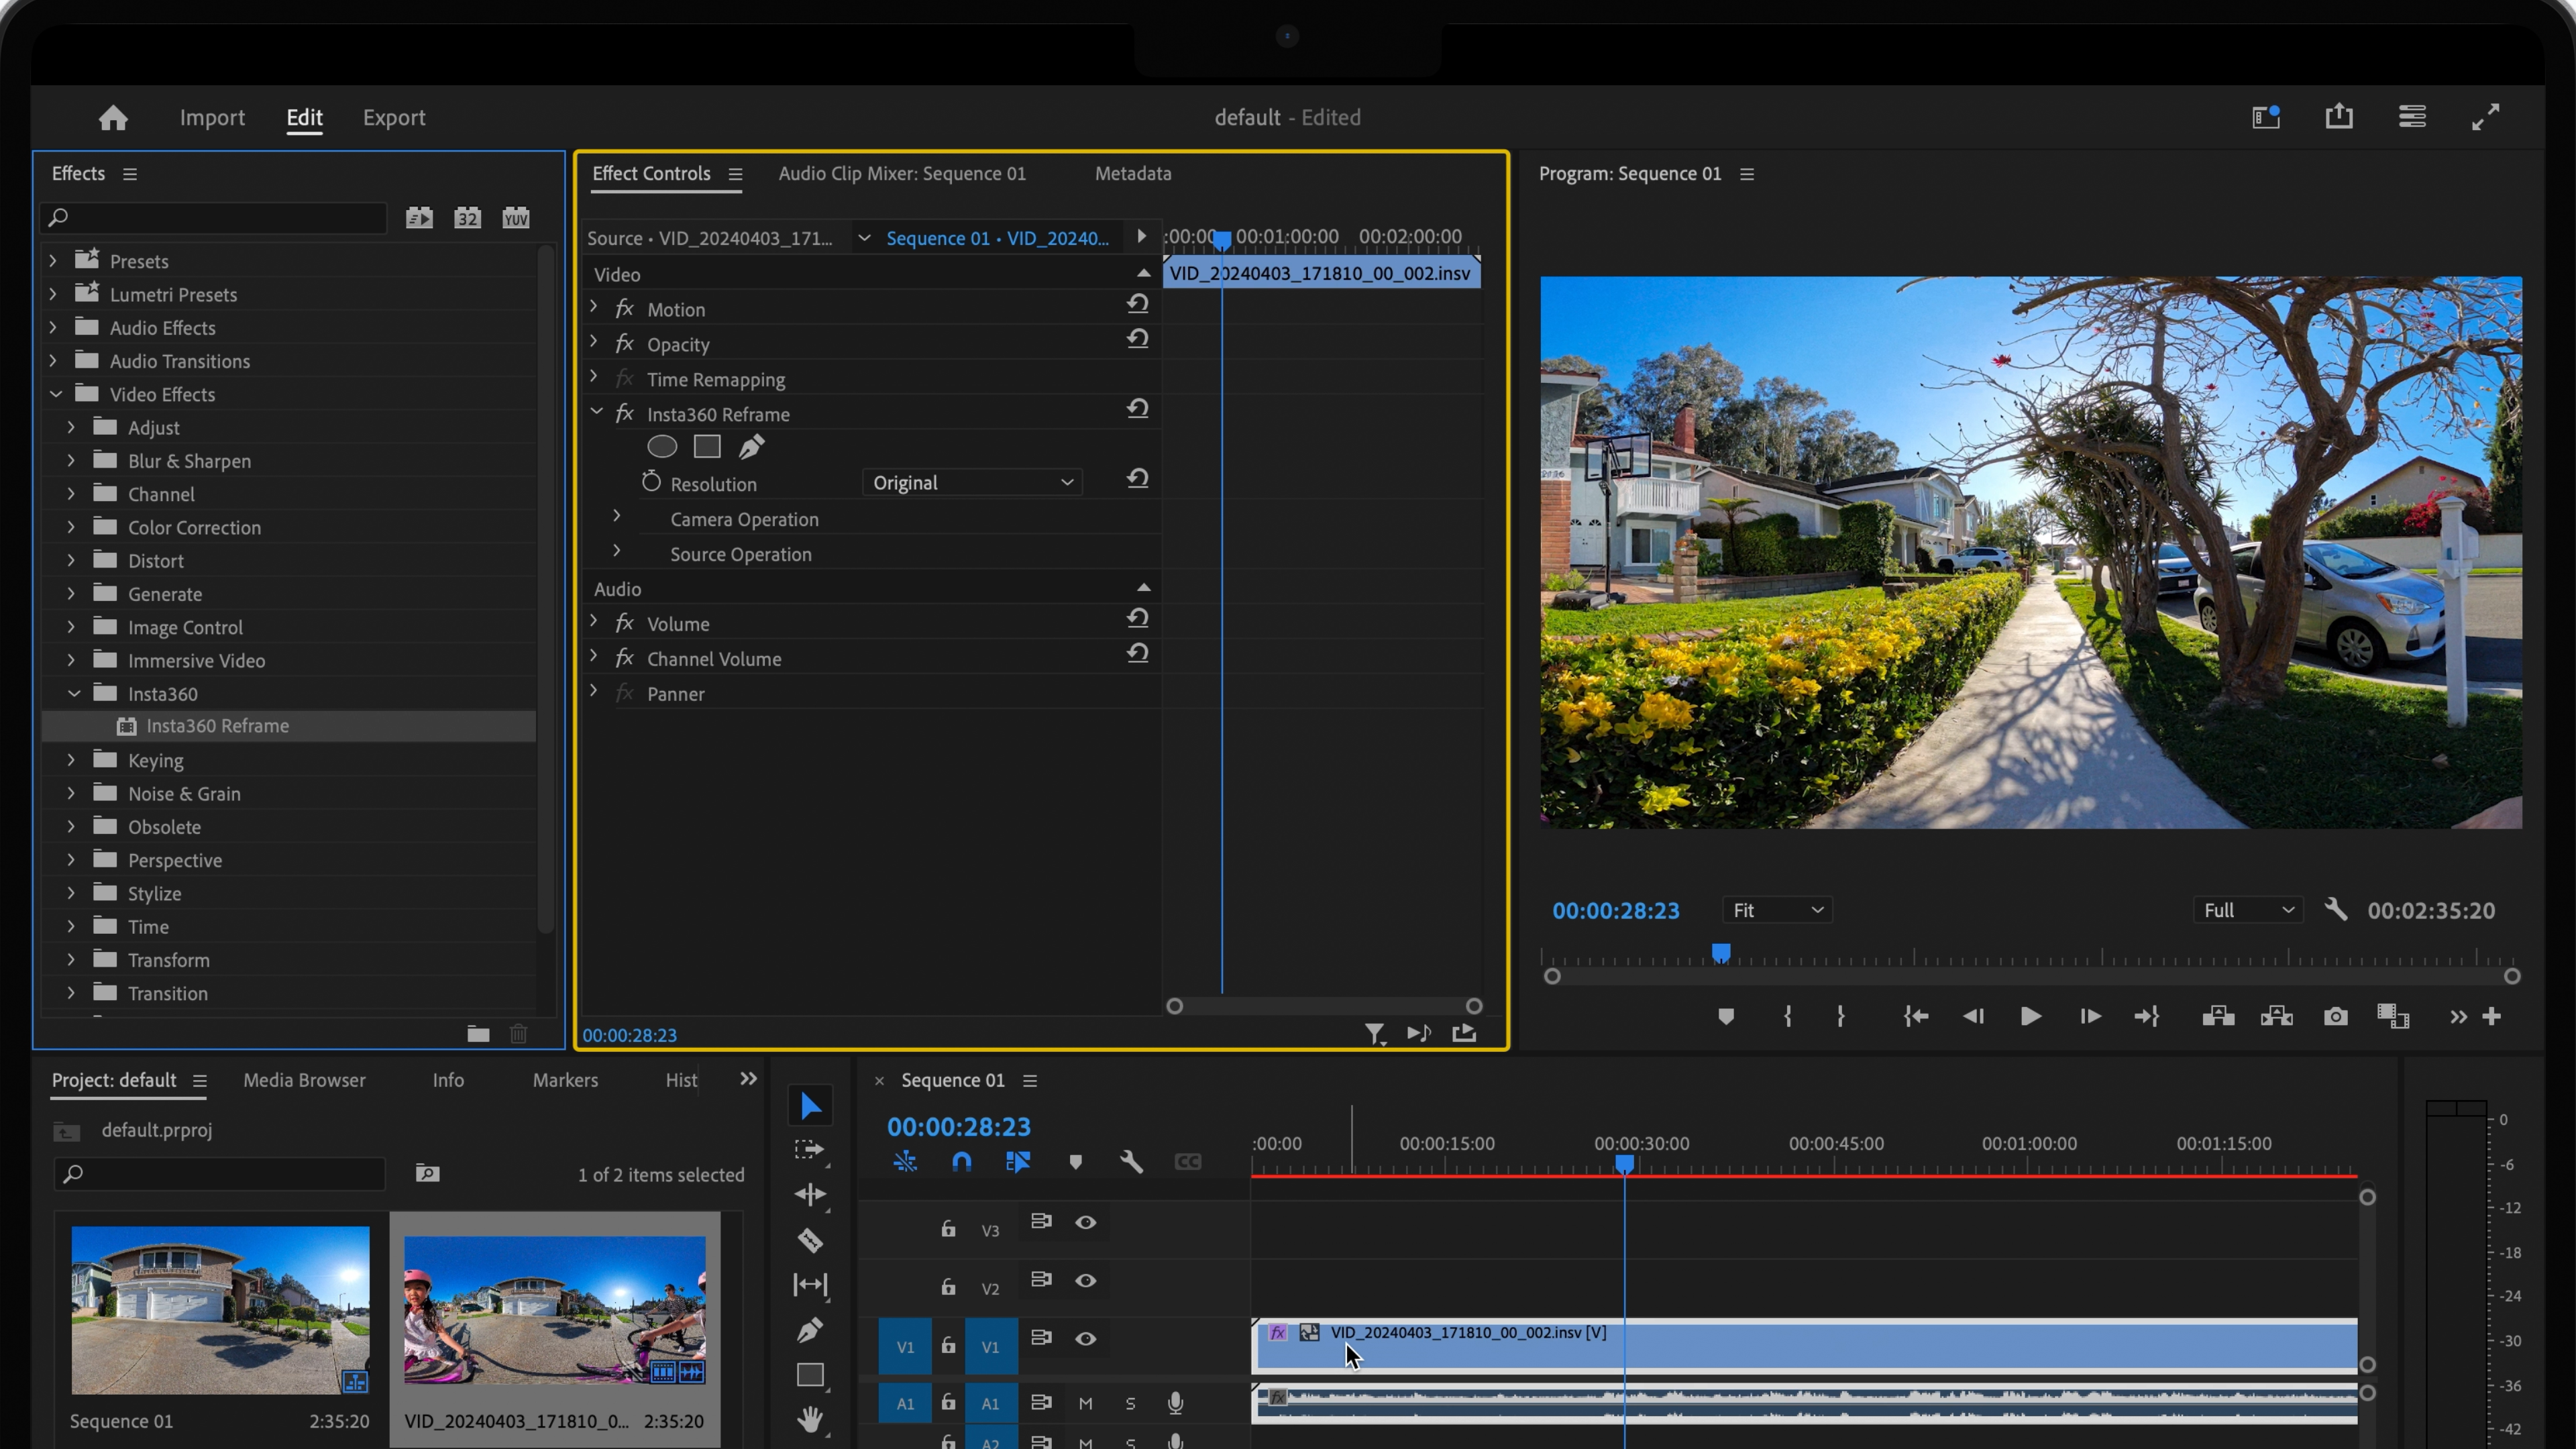
2.Drag the Insta360 Reframe plug-in into the sequence to apply it to the clip. You can use Insta360 Reframe to edit the 360º video in the Effect Controls panel.
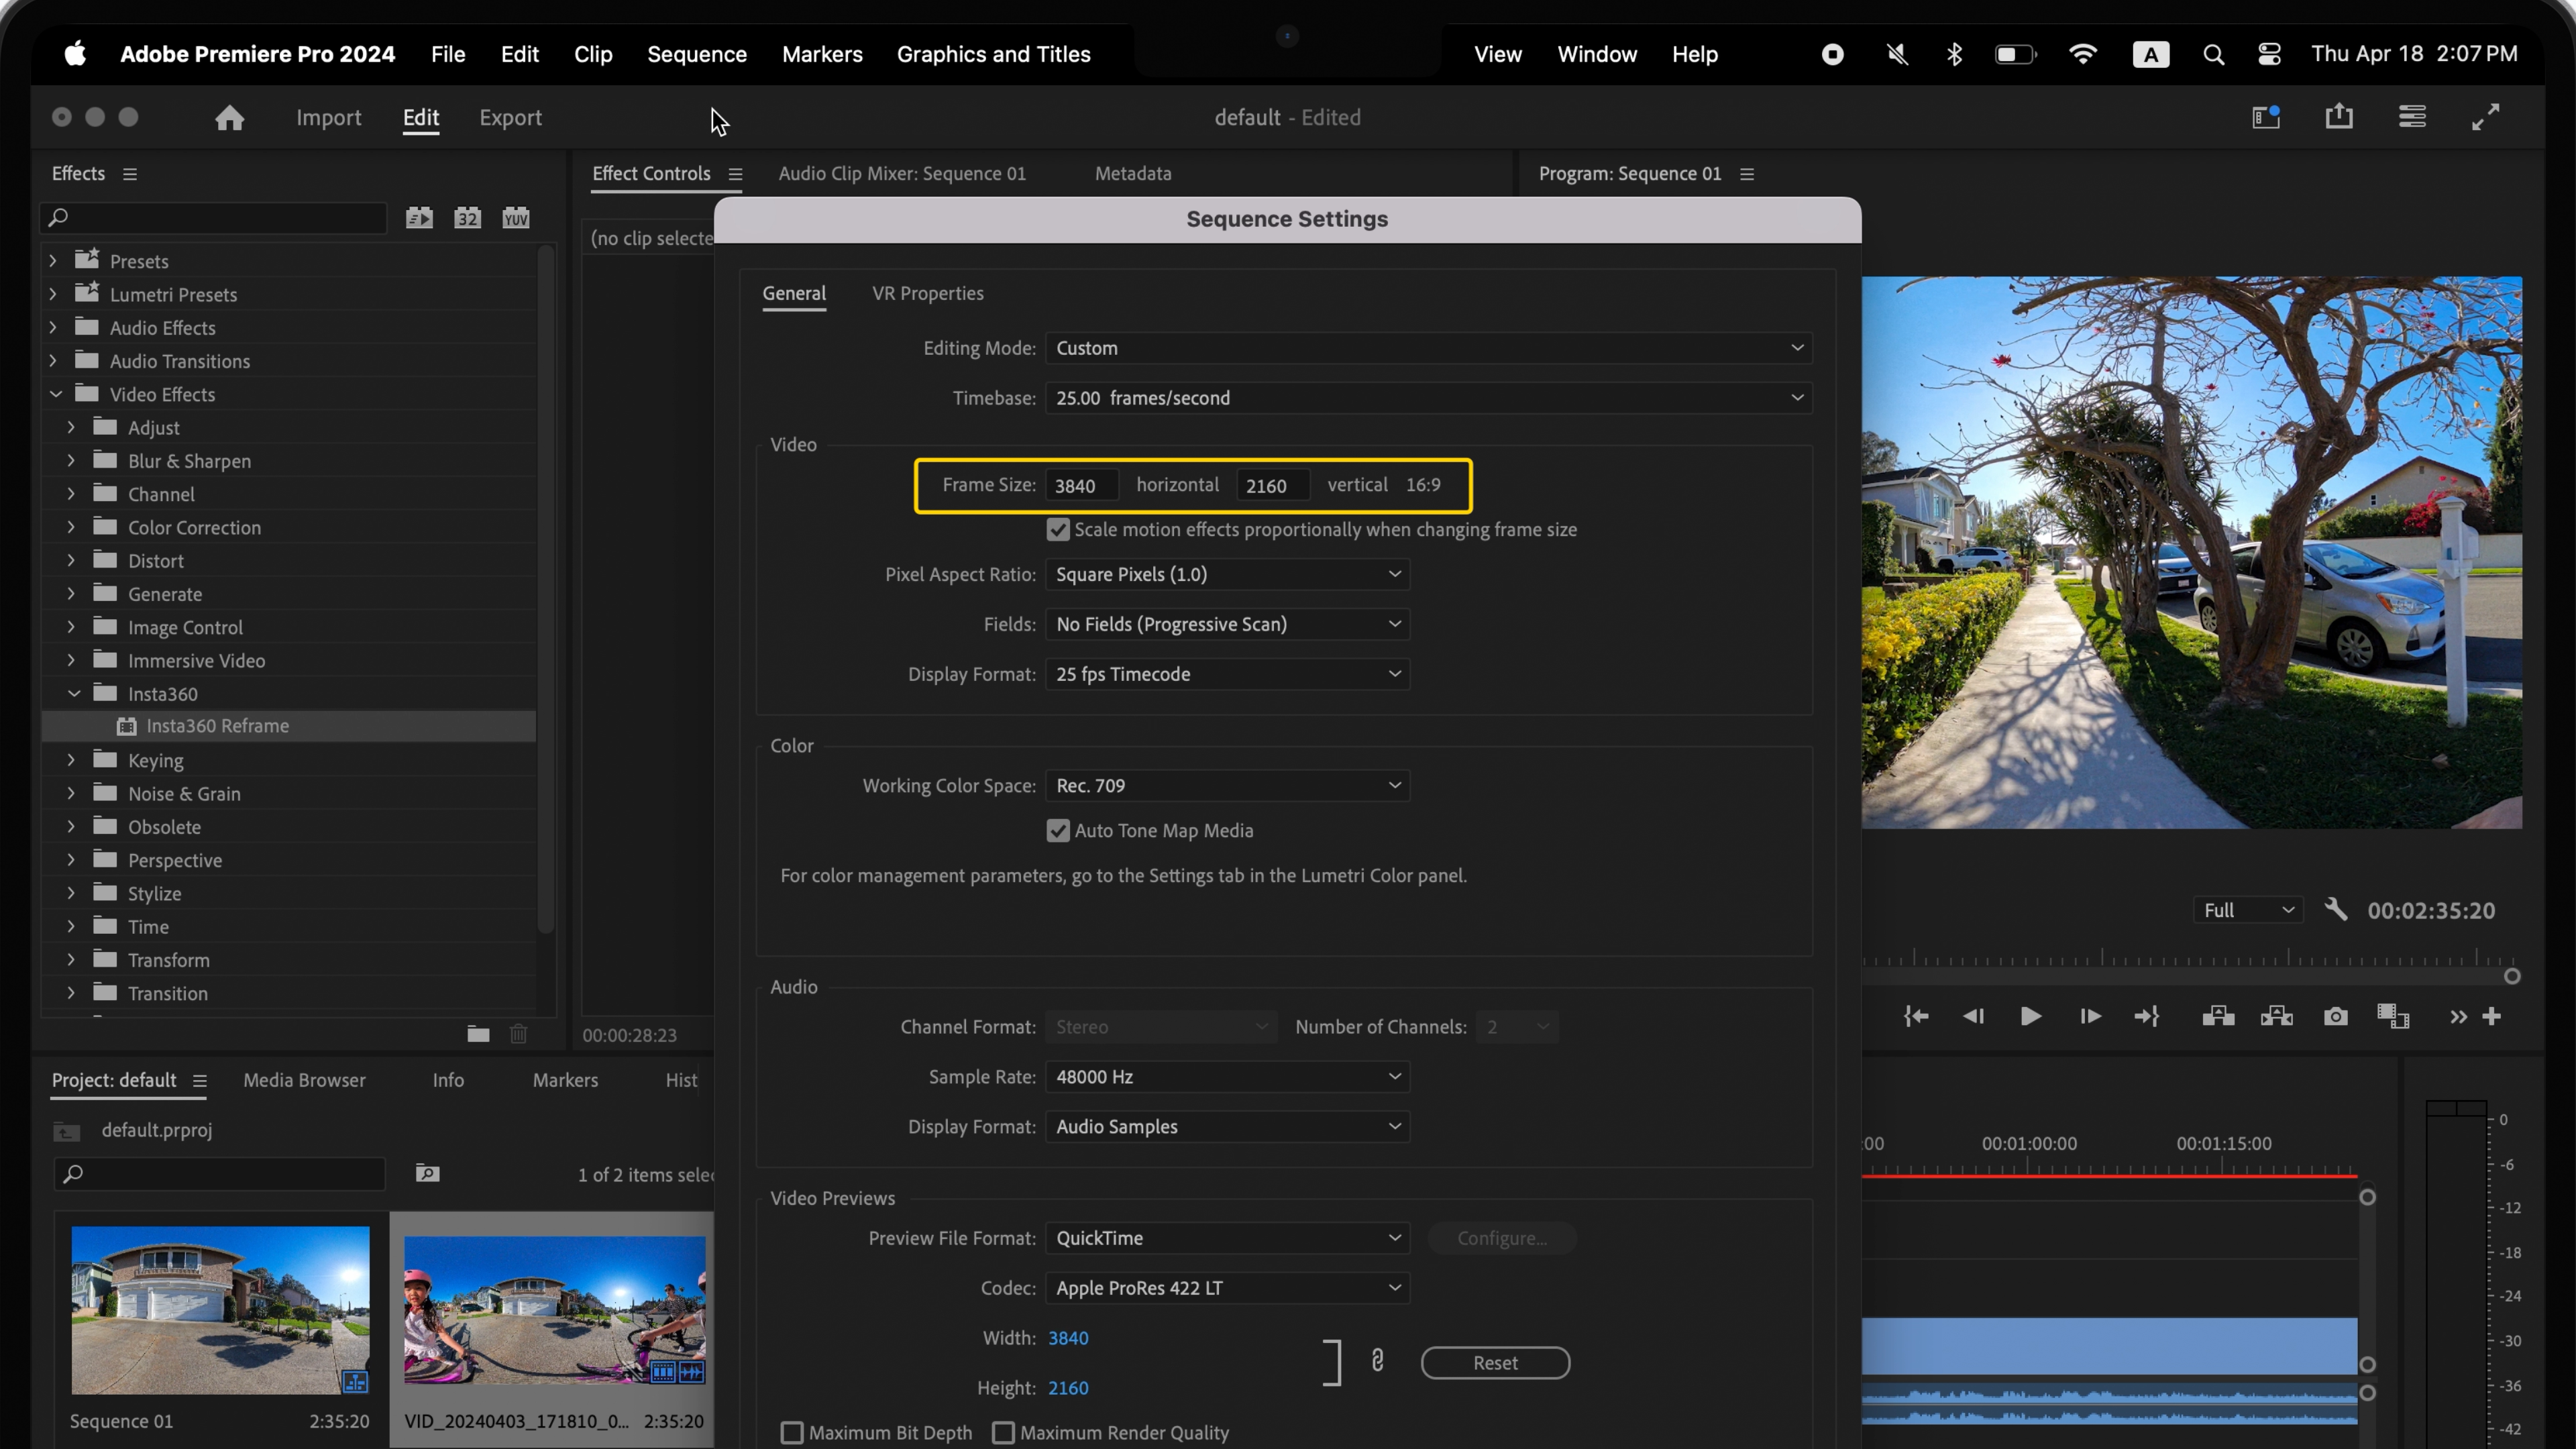
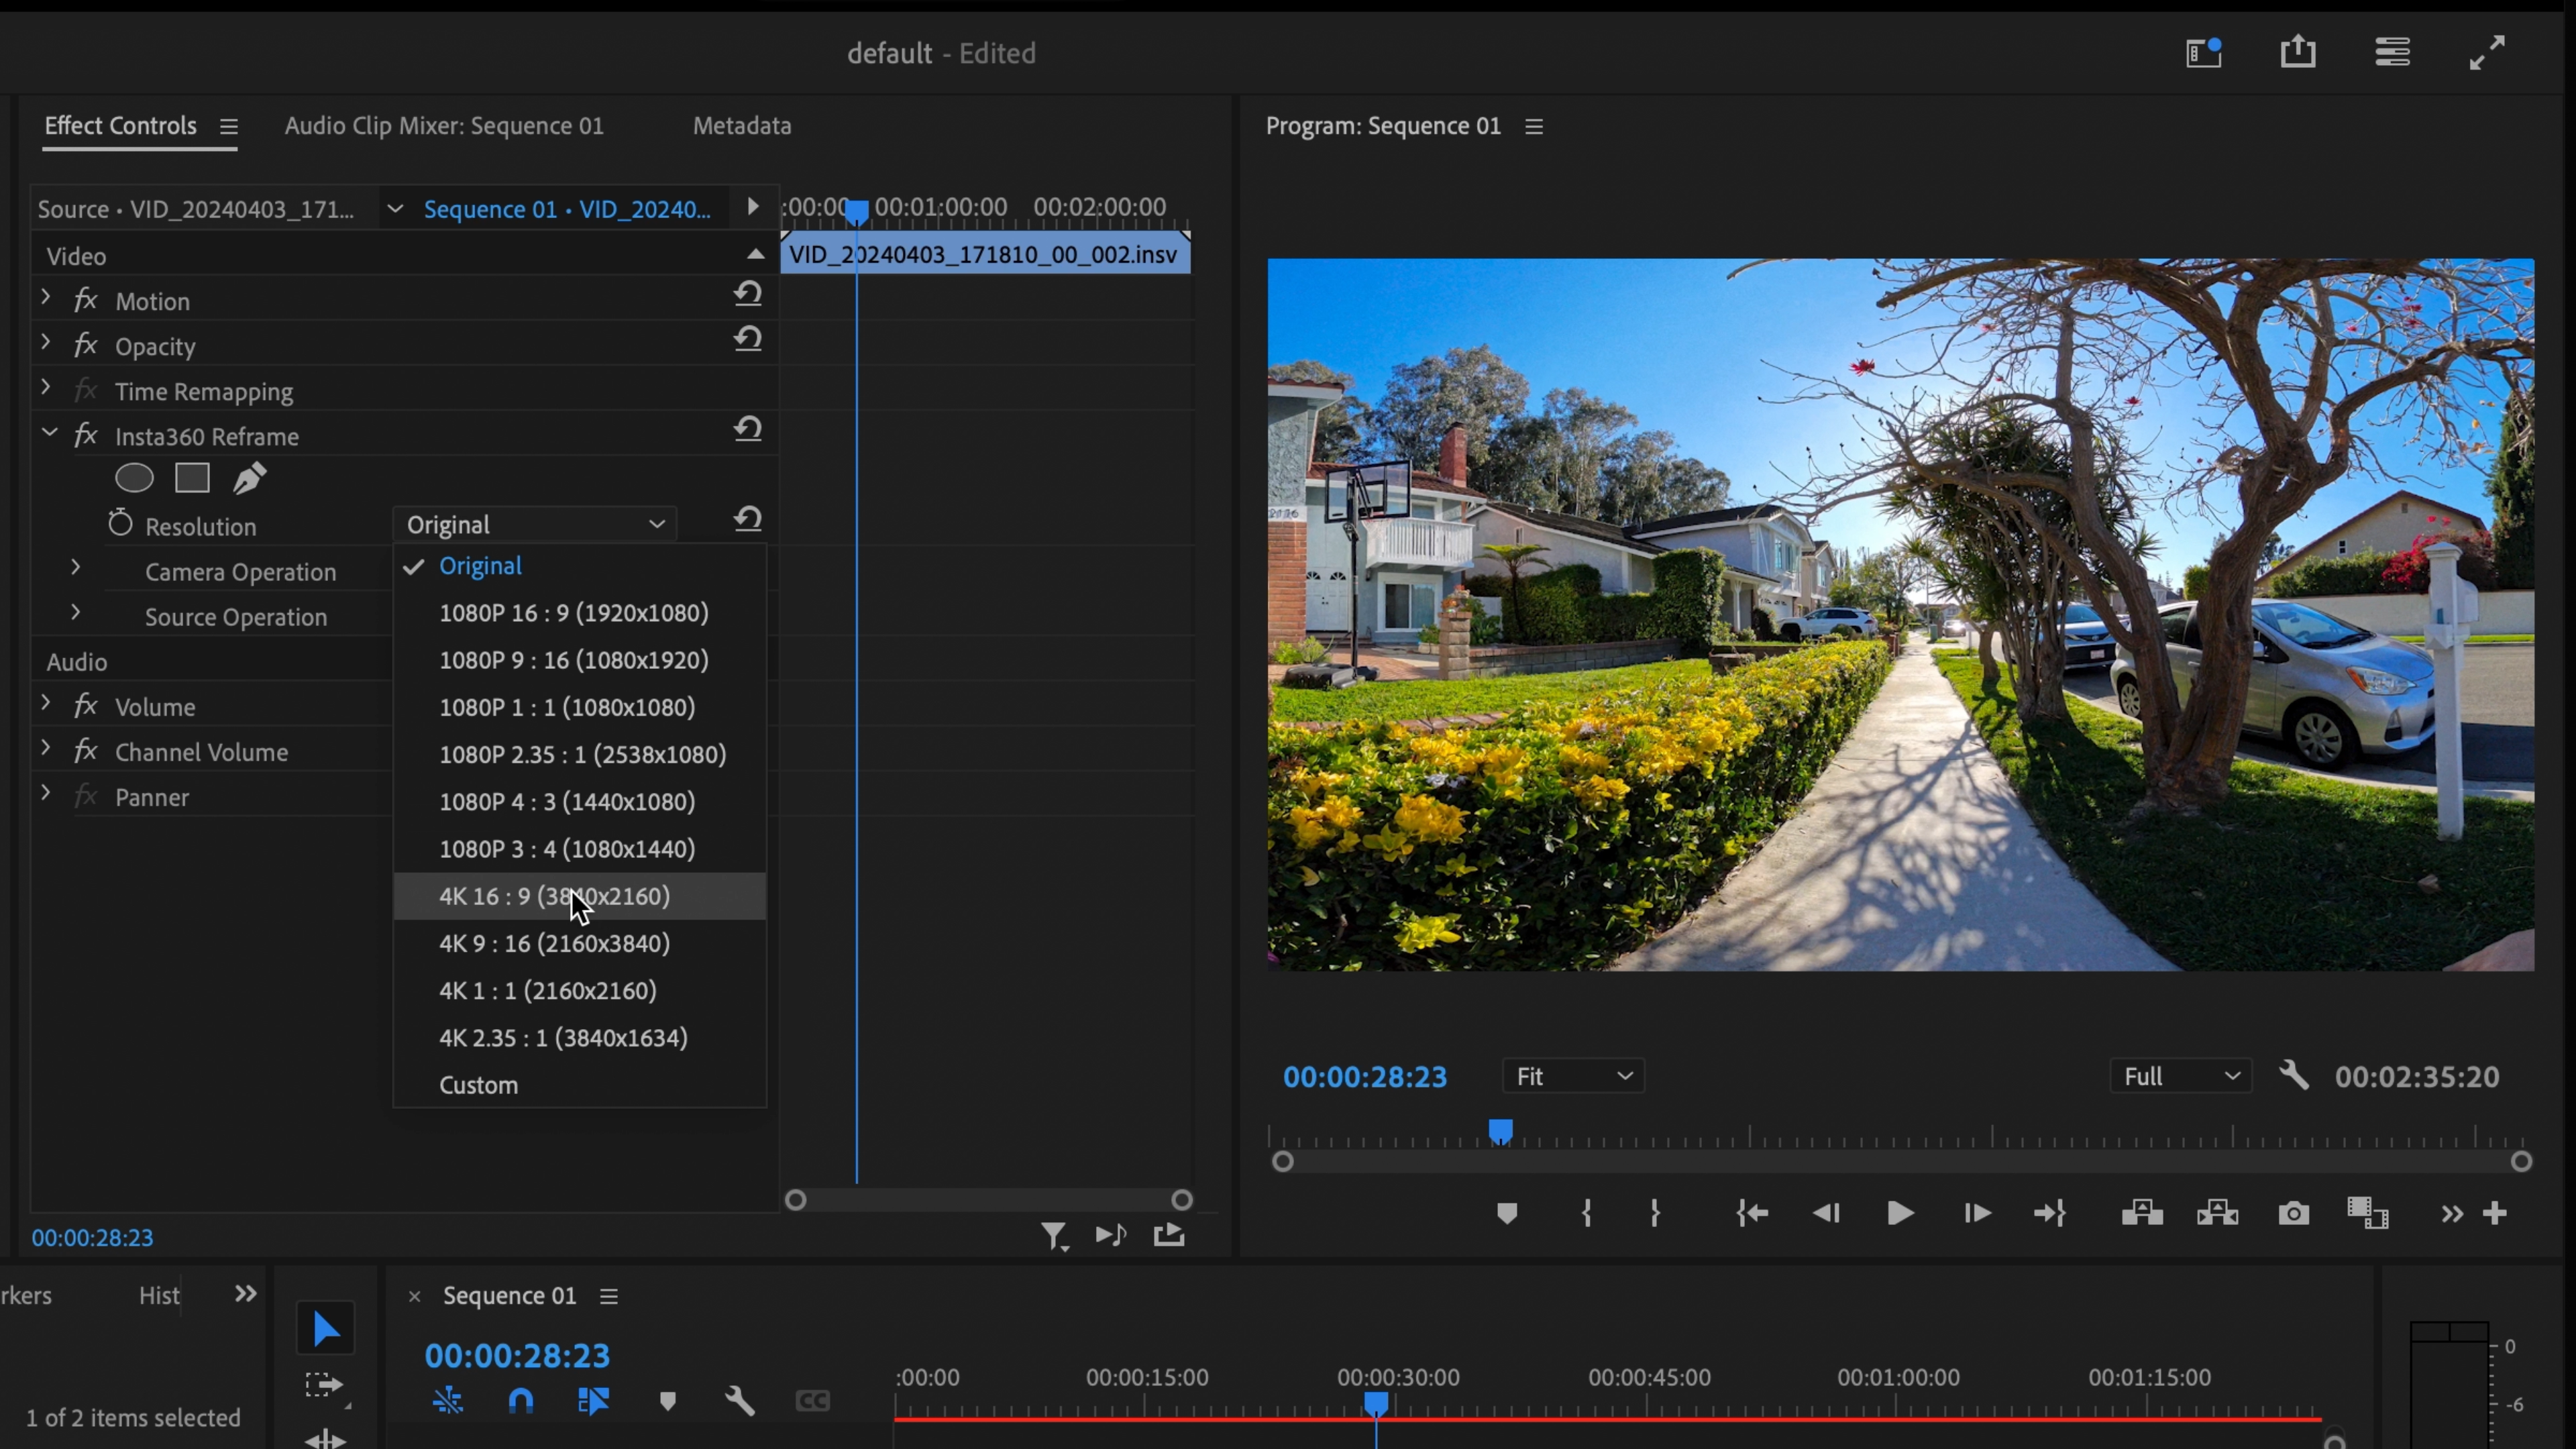
3.Before editing, check the resolution in Sequence Settings. Select the corresponding resolution in the "Resolution" menu. If you find the playback lags, turn down the playback resolution in the monitor or click "Toggle Proxies" below the monitor to preview and edit with the proxy file.
*Using proxy files for editing results in a lower-quality preview, but the quality of the final exported file remains unaffected.
Plug-In Features
Open "Camera Operation" to adjust the field of view.
●Click "Projection" to choose whether to keep or correct the image distortion.
*Crystal Ball and Tiny Planet do not support distortion correction.
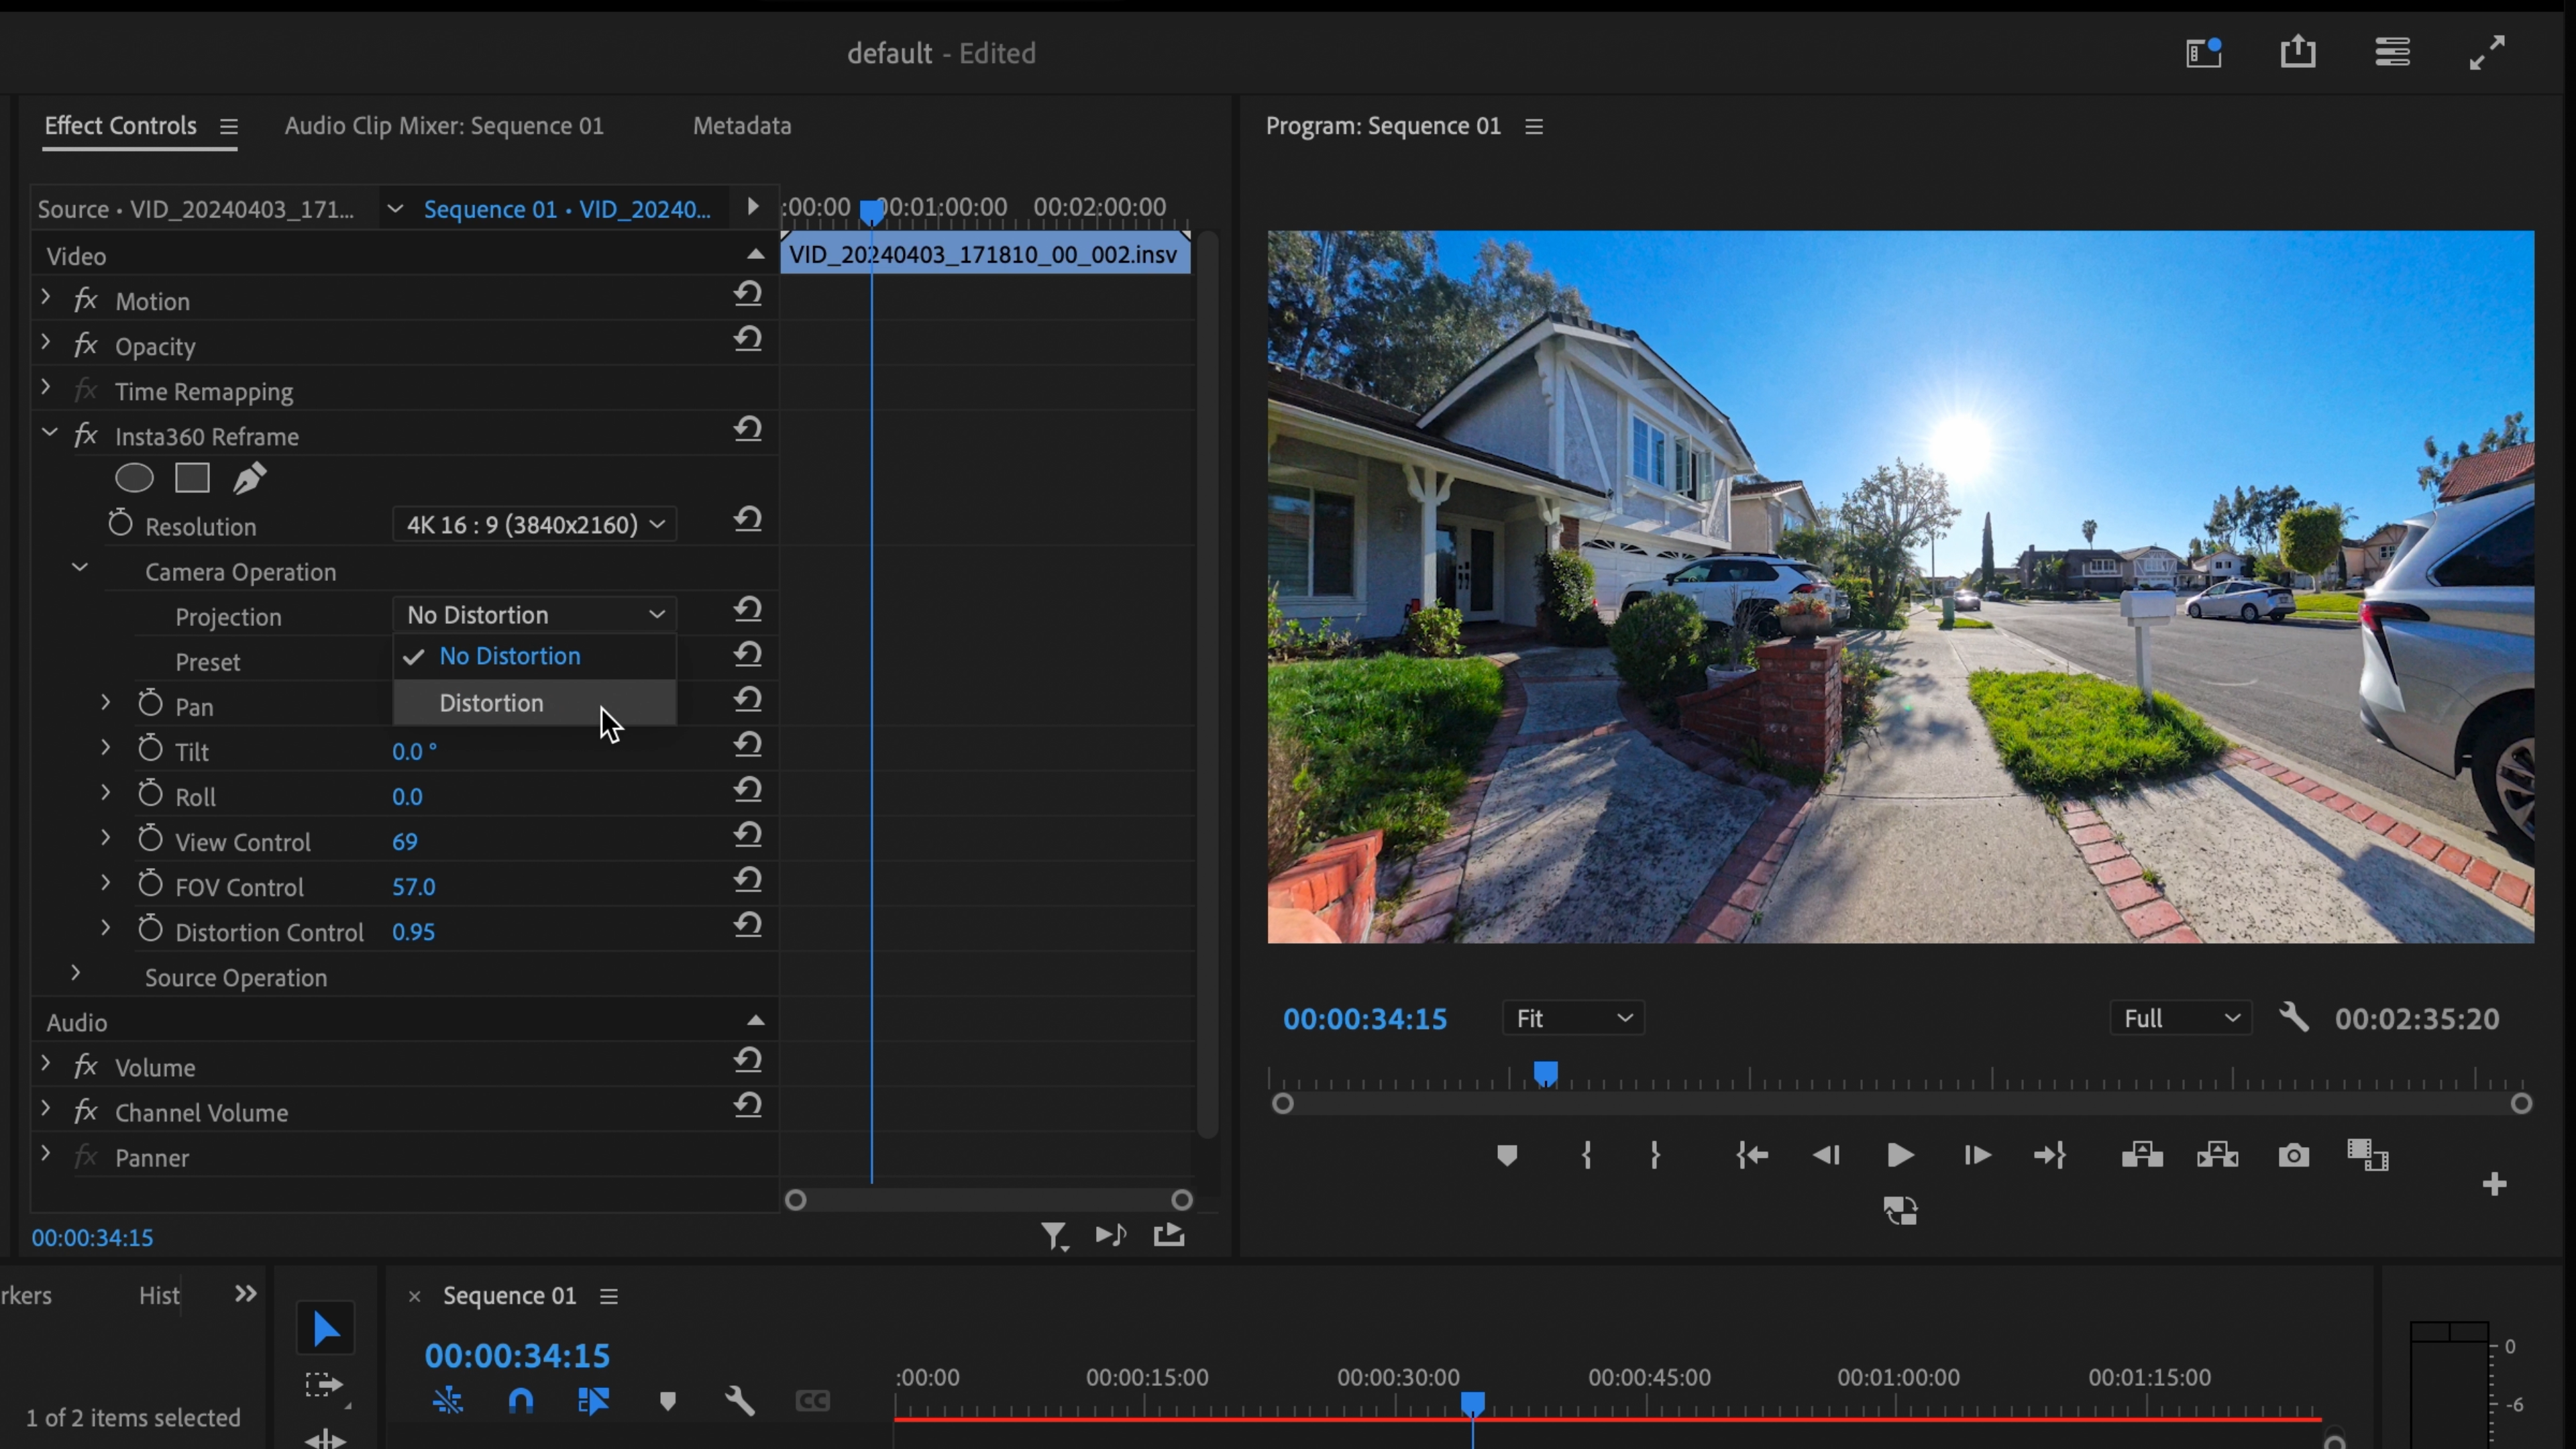
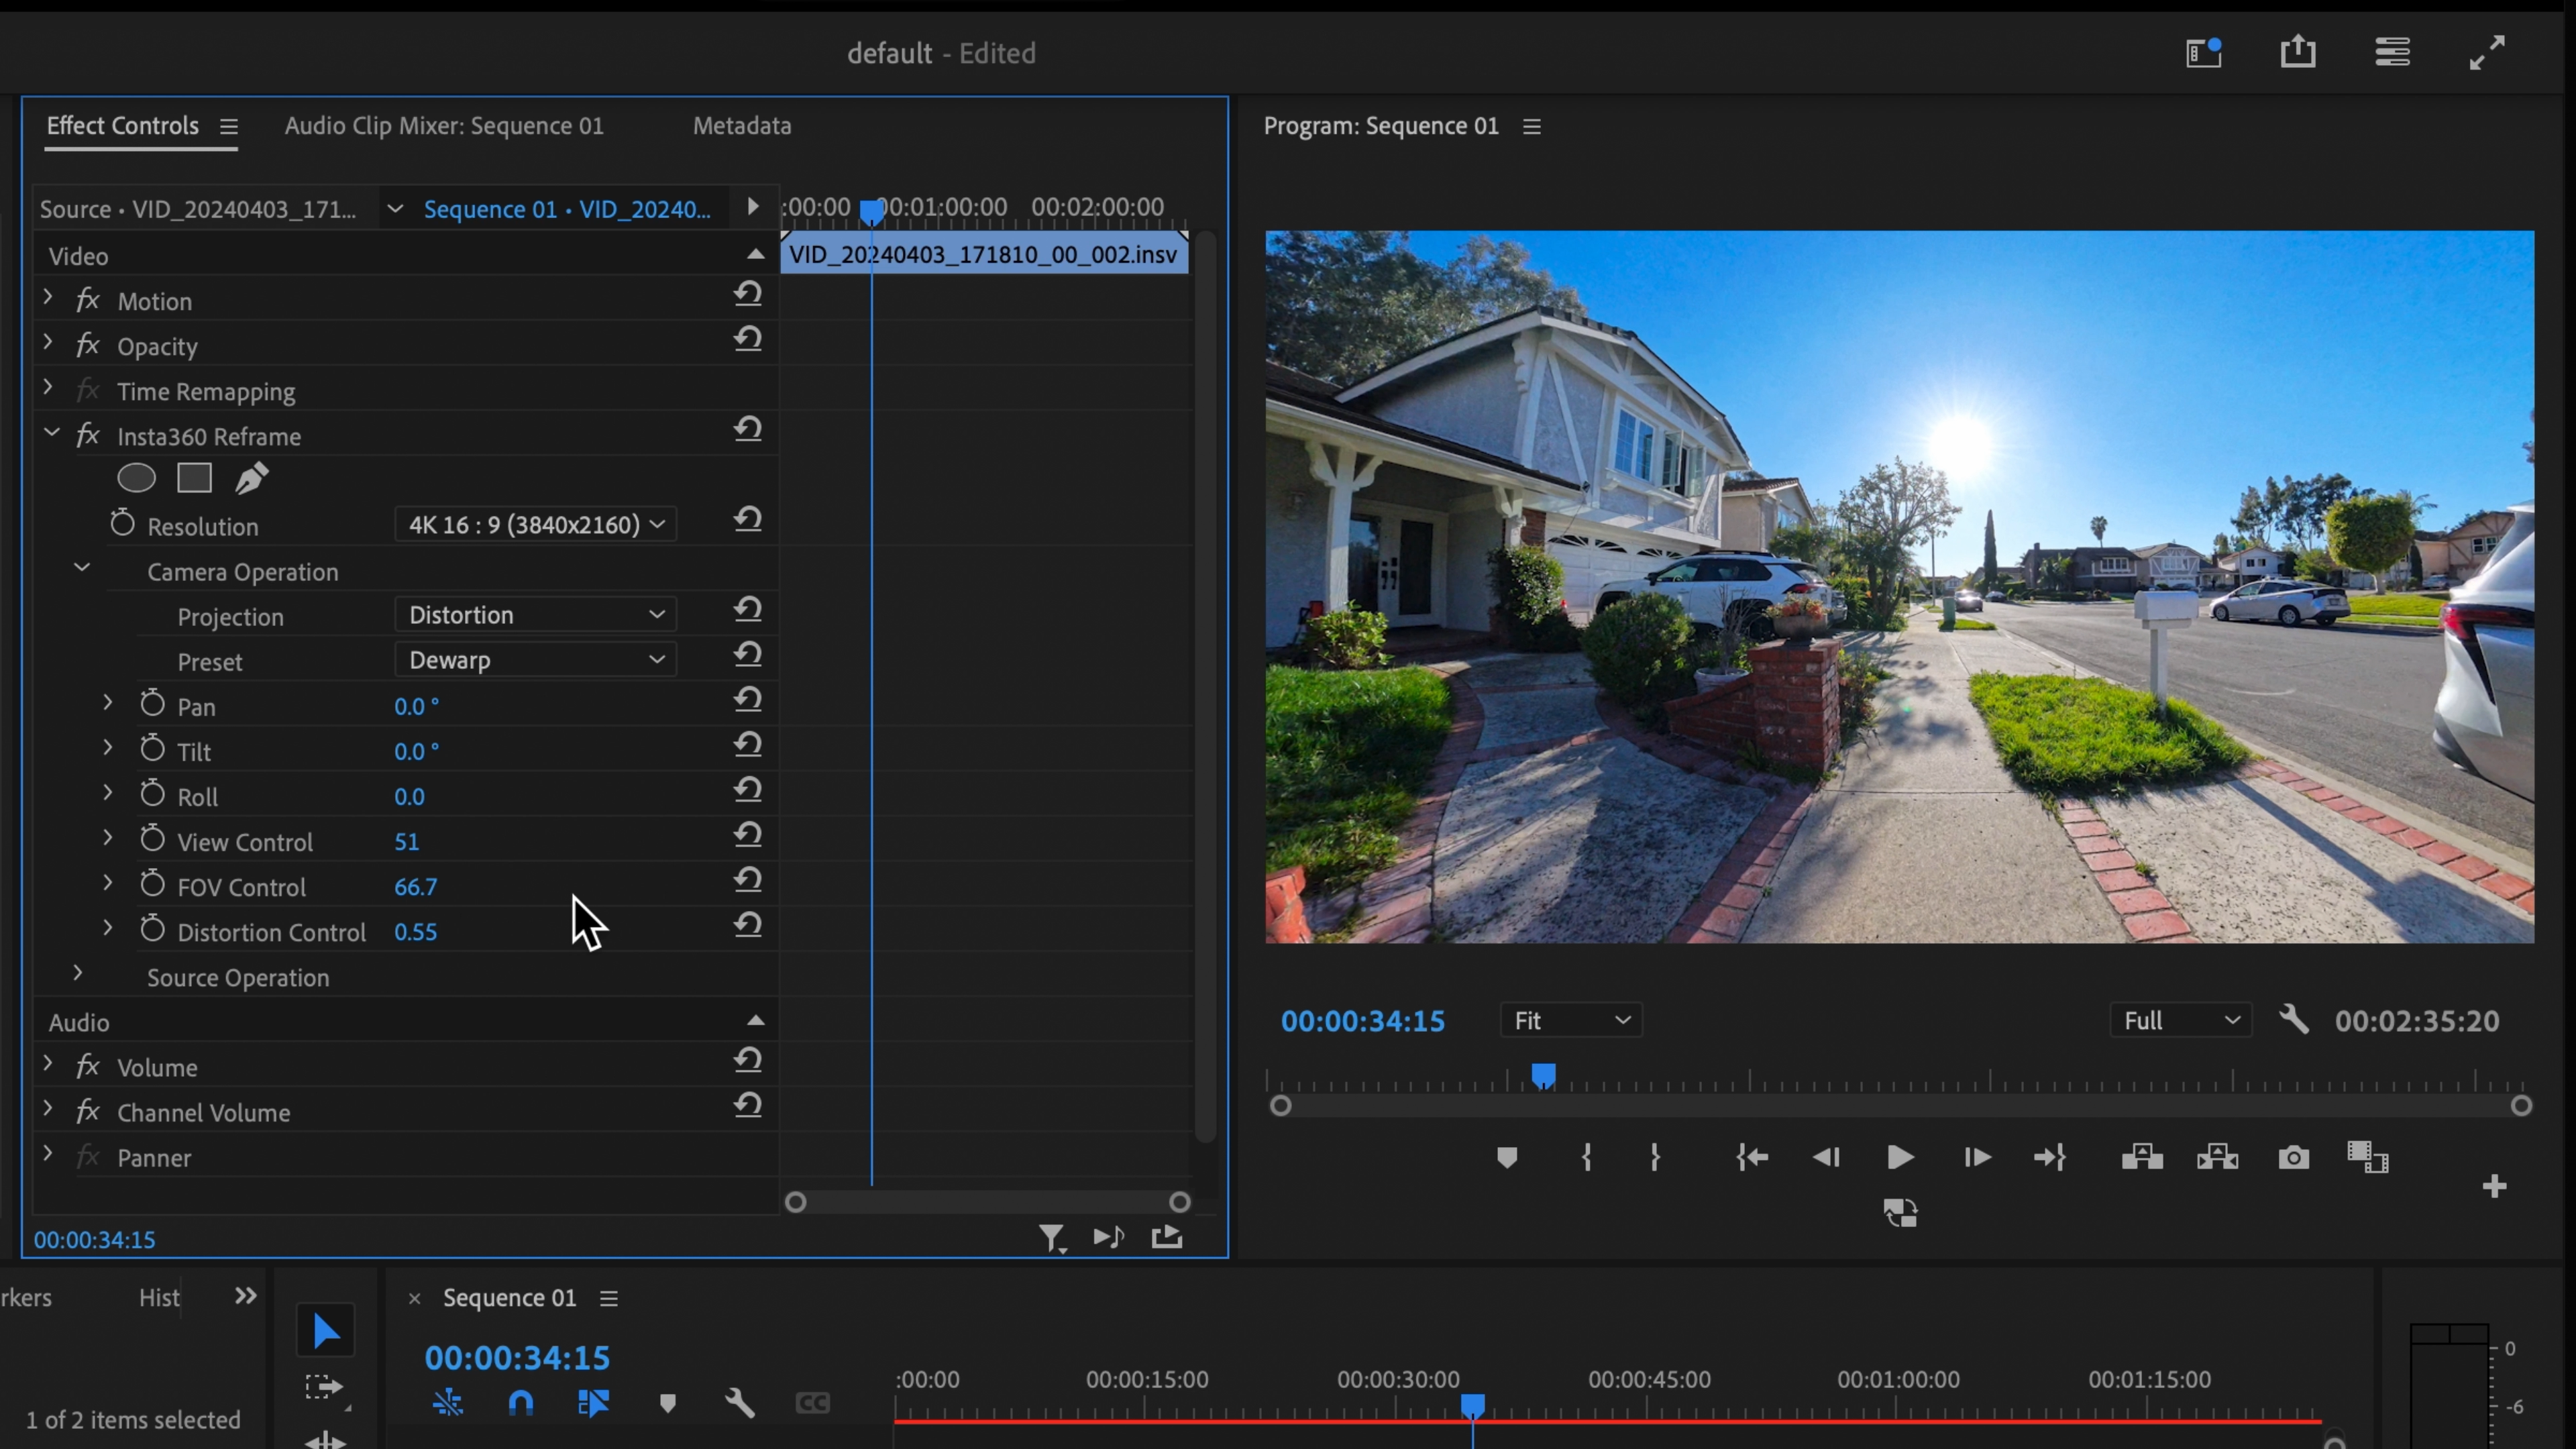
● Click "Preset" to select a preset field of view.
● "Pan" allows you to adjust the horizontal angle of the image.
● "Tilt" changes the vertical angle of the image.
●"Roll" rotates the image on its axis.
● "View" adjusts the field of view.
●Some 360º images may appear distorted when you open them. To fix this, straighten the image using the tools in Source Operation and then frame your shot using Camera Operation.
Adjust Perspective With Keyframes
While editing, you can set the perspective by adjusting Pan, Tilt, Roll, and View. You can also use keyframes to control the perspective throughout the clip, allowing you to simulate dynamic camera movements in post-production.
For example, if you want to adjust the horizontal angle:
1.click the "Keyframe" icon next to "Pan" to start the toggle animation and fix the current horizontal perspective. Drag the timeline to the point where you want to adjust the perspective.
2.Adjust the "Pan" setting to alter the horizontal angle at that specific moment. This creates a panning effect as the scene transitions between two horizontal perspectives. You can control the direction of the panning effect by adjusting the angle values to positive or negative.
3.However, you may notice an abrupt motion at the beginning and end of this effect. Smooth out the motion with custom keyframe curves:
Right-click on the first keyframe and choose "Ease Out" to start the movement gradually. Then, right-click the second keyframe and select "Ease In" to create a smooth transitional camera movement between the two perspectives.
Additionally, you can achieve various transitions by adjusting the Bezier curve.
Adjust Perspective With Multiple Keyframes
You can also add multiple keyframes to change between multiple perspectives seamlessly in the same video.
1.Adjust FOV Control and Tilt to create a Tiny Planet or Reverse Tiny Planet effect.
Adjust the subject's position in the Tiny Planet using "Pan". Click on the keyframe icon to fix the current perspective.
2.Drag the timeline and adjust the FOV Control, Tilt, and Pan again to set the perspective to a wide angle. Then, add Ease In and Ease Out to the keyframes to smoothly transition from "Tiny Planet" to "Wide Angle."
Experiment by adding more keyframes for more creative and dynamic camera moves.


