


Timelapse videos have become an increasingly popular way of showing off a new city or travel destination. They offer a unique way to speed up time, turning everyday life into fast-paced action, and once perfected, offer a dynamic new way to create. Imagine compressing hours, days, or even months to experience a whole new perspective in seconds!
Whether you’re capturing the hustle and bustle of city life, the serene beauty of a sunset, or the mesmerizing movement of stars, here are three exciting and easy ways to create stunning timelapse videos using your Insta360 camera, an iPhone, and an Android phone. Ready to add some magic to your videos? Let's get started!
What is a Timelapse?
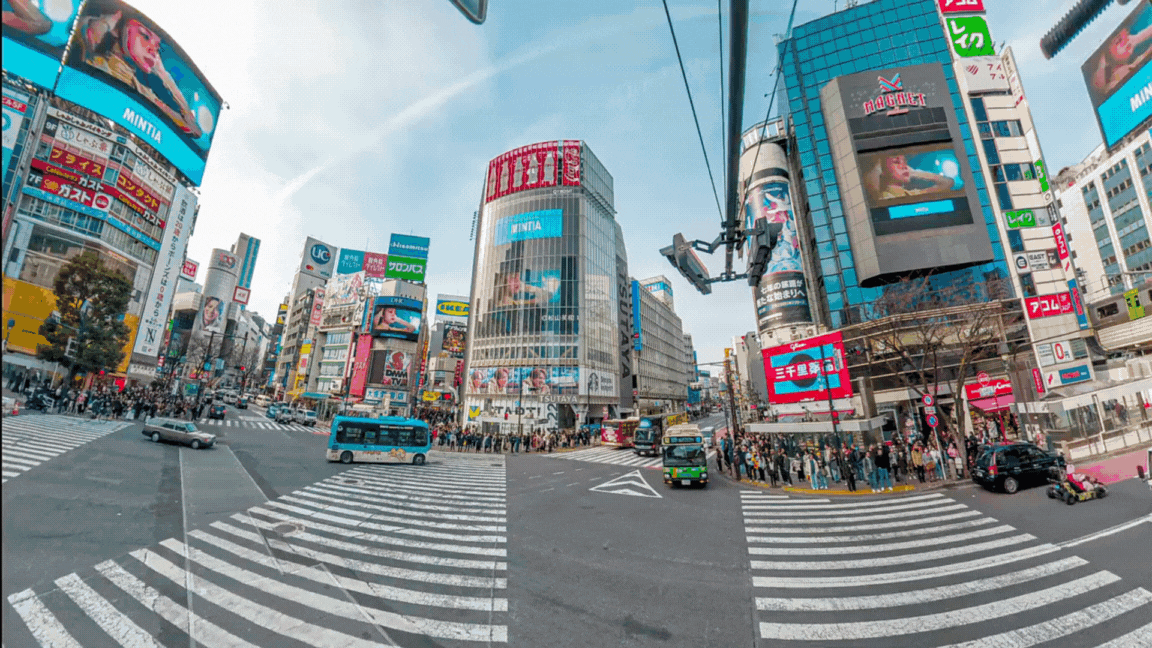
A timelapse is a video technique where the frequency of film frames is captured at a much lower rate than usual. When played at normal speed, time moves faster, called “lapsing”. A sunset that takes hours in real time can be condensed into a breathtaking 30-second clip! Timelapses are perfect for capturing dynamic scenes like sunsets, sunrises, bustling city streets, and more, offering a unique, high-speed perspective on the world.
.gif)
Timelapses can also be used to document slow changes that aren't immediately noticeable to the human eye. For example, the blooming of a flower, the construction of a building, or the shifting patterns of the stars in the night sky. This technique brings a new dimension to storytelling, making it possible to witness and appreciate processes that typically unfold over long periods. You'll probably spot them in some of your favorite movies! Inception uses timelapses in its iconic city-bending scenes and to signify the passing of time in the dream sequences.
If you’re still not sure how to do a Hollywood-style timelapse video, here’s our handy guide with three different ways to create one.
Method 1 – Camera
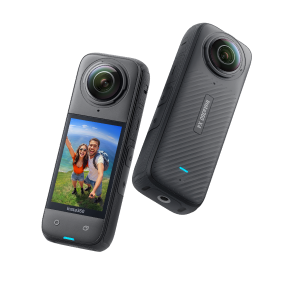
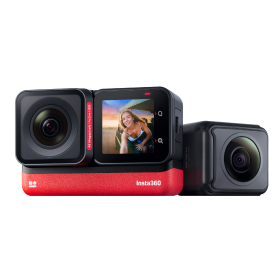
How to Do a Timelapse Video with Insta360 X4
Step up your timelapse game with a high-tech 360º camera like Insta360 X4. With excellent stabilization, 11K timelapses and creative effects like a moving hyperlapse, your videos won't be short of dynamic.
Here's how to get started:
- Set Up Your Camera: Place your Insta360 X4 on a stable surface or a heavy-duty tripod like the Insta360 All Purpose Tripod. A solid setup is essential to ensure that your footage remains steady and professional-looking, especially if you’re shooting in windy conditions or on uneven terrain.
- Choose Timelapse Mode: Choose Timelapse Mode in the camera settings. This mode is specifically designed for capturing 11K timelapse videos.
- Adjust Settings: Set the resolution, frame rate and interval (time between each shot). The interval you choose will depend on the speed of the movement you’re capturing. For fast-moving scenes like traffic, a shorter interval (1-2 seconds) works well. For slower changes like a blooming flower or a setting sun, longer intervals (5-10 seconds or more) are ideal. Adjust the duration based on how long you want your final timelapse to be; remember that longer durations will give you more footage to work with.
- Start Shooting: Hit the Shutter Button and let the camera work its magic. Ensure your camera has enough battery (though you should be fine with 135 minutes!) and storage space to last the entire duration of the shoot. Consider using an external power source or extra memory cards for extended shoots. Regularly check your camera to make sure it’s still recording.
Take your timelapses to the next level and speed up time and space with TimeShift. For a detailed tutorial on both shooting modes, check out this video.
Pros
- High-Quality Footage: Capture stunning 360º footage with crystal clear 11K resolution.
- Compact: Fits in your pocket and is easy to carry around.
- Advanced Features: Benefit from features like Timed Capture, where you can set the camera to automatically power on and start shooting at a specific time. Perfect for those slightly-too-early sunrises!
- Flexibility: More control over settings like exposure, interval, and duration.
Tips
- Experiment with Intervals: Shorter intervals are great for fast-moving subjects, while longer intervals work best for slow changes like sunsets.
- Stable Setup: Ensure your camera is steady to avoid shaky footage.
Insta360 X4 offers advanced built-in stabilization technology, which is crucial for creating smooth and professional-looking timelapse videos. FlowState Stabilization helps to eliminate any minor shakes or vibrations, ensuring that your final product is of the highest quality. With Insta360 X4, you have all the tools you need to create mesmerizing timelapse videos that captivate your audience.
Method 2 - iPhone
How to Do a Timelapse With Your iPhone
Creating a timelapse video on your iPhone is super easy and convenient for iOS smartphone creators. Here’s how:
- Open the Camera App: Unlock your iPhone and open the Camera app. Swipe left or right until you find the Time-lapse mode. This mode is specifically designed for creating timelapse videos and automatically sets your iPhone to capture frames at intervals.
- Set Up Your Phone: Place your iPhone on a stable surface, tripod or gimbal for the best results. Stability is key to a smooth timelapse video.
- Start Recording: Tap the red record button and let your iPhone capture the magic. Make sure your phone has enough battery life and storage space for the full duration. Timelapse videos can quickly consume storage, so it’s a good idea to free up space before you start shooting.

Pros
- Convenience: You always have your phone with you, making it easy to capture spontaneous timelapse videos.
- Ease of Use: Intuitive interface with minimal setup required.
- Portability: Lightweight and easy to carry around.
Tips
- Plan Your Shot: Think about the movement you want to capture and position your phone accordingly. If it’s a busy tourist area, try to find spots that have fewer people in the way.
- Battery Life: Make sure your phone is fully charged or connected to a power source for longer timelapses.
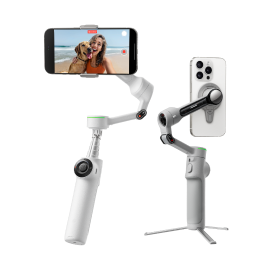
- Keep It Steady: Use a tripod or rest your phone on a stable surface to avoid shaky footage. Grab a gimbal like Insta360 Flow Pro and extend the built-in tripod for guaranteed smooth shots!
.gif)
One of the great advantages of using an iPhone is the availability of various apps that can enhance your timelapse video. Apps like Hyperlapse offer additional features such as advanced stabilization and custom speed settings, giving you more creative control. iPhones also have excellent low-light capabilities, allowing you to capture stunning timelapses even in challenging lighting conditions. Experiment with different apps and settings to find the best combination for your needs and elevate your timelapse videos to the next level.
Method 3 – Android Phone
How to Make a Timelapse Video with Your Android Phone
Most modern Android phones come with a built-in timelapse mode. Here’s how to create a timelapse video:
- Open the Camera App: Switch to the time-lapse mode. If your Android phone doesn’t have a dedicated timelapse mode, you can download third-party apps like Time Lapse Camera or Lapse It from the Google Play Store.
- Set Up Your Phone: For the best results, place your phone on a stable surface, gimbal, or tripod. If you don’t have a tripod, make sure your phone is placed securely to avoid any shakes or accidental movements.
- Start Recording: Hit the record button and let your phone capture the scene. Ensure your phone has enough battery life and storage space to accommodate the duration of your timelapse. It’s also a good idea to turn on airplane mode to prevent interruptions from calls or notifications.

Pros
- Customizable Settings: Some Android phones offer more customizable settings than iPhones.
- Wide Range of Devices: Available on many different phone models.
- Ease of Access: Simple and straightforward to use.
Tips
- Stable Positioning: As with any timelapse, keeping your phone stable is key. We recommend using your phone on a gimbal like Insta360 Flow Pro and extending the built-in tripod to ensure your video stays nice and stable.
- Lighting Conditions: Shoot in good lighting for the best results, or use a night mode if available for low-light scenarios.
- App Options: Explore third-party apps for more advanced features and controls.
Android users can take advantage of the diverse range of third-party apps available on the Google Play Store. Apps like Lapse It and Framelapse offer advanced timelapse features, including the ability to adjust frame rates, add filters, and edit videos directly within the app. These apps often provide more flexibility and customization options compared to the native camera app. Additionally, many Android phones have impressive battery life, allowing for longer shooting sessions without the need for frequent recharging. Explore different apps and settings to find the perfect setup for your timelapse projects.
Start Shooting
Timelapse videos offer endless creative possibilities, allowing you to tell stories in a visually captivating way. With practice, you'll develop a keen eye for choosing the right subjects, intervals, and durations to create stunning timelapse videos. Try simply walking around with your Insta360 X4 and the Extended Edition Selfie Stick (it's 3m long and disappears in your footage!) and speed it up into an eye-popping hyperlapse.
Once you feel more confident, you can hit the editing room with just your phone's footage and create some really sick timelapse videos. Check out this one filmed with Insta360 Flow Pro and an iPhone.
Remember to be patient and persistent, as the best timelapse videos often require careful planning and a bit of trial and error. So, embrace the process, have fun, and watch as your timelapse videos bring new perspectives and awe-inspiring moments to life. Happy shooting!
Keen to keep up to date on Insta360 stories? Keep an eye on our blog and sign up for our mailing list. Got a story to share? Email yours to communitystories@insta360.com and win up to US$50.


.jpg)


%20(1).svg)
%20(1).svg)
.svg)


