Insta360 Studio 2019 Tutorial
- You can now preview 5.7K 360° videos and edit them with FreeCapture in the latest version of Studio. You can also edit Bullet Time videos, and optimize their stitch.
- Here’s how:
- Contents
- 1. Play 360° Videos
1.1 Preview 360° videos
1.2 Stitching effects & optimization settings
2.1 Determine your edit
2.2 Add keyframes
2.3 Set transitions between keyframes
2.4 Modify keyframes
2.5 Render and export videos
- 1. Play 360° Videos
1.1 How to Preview 360° videos
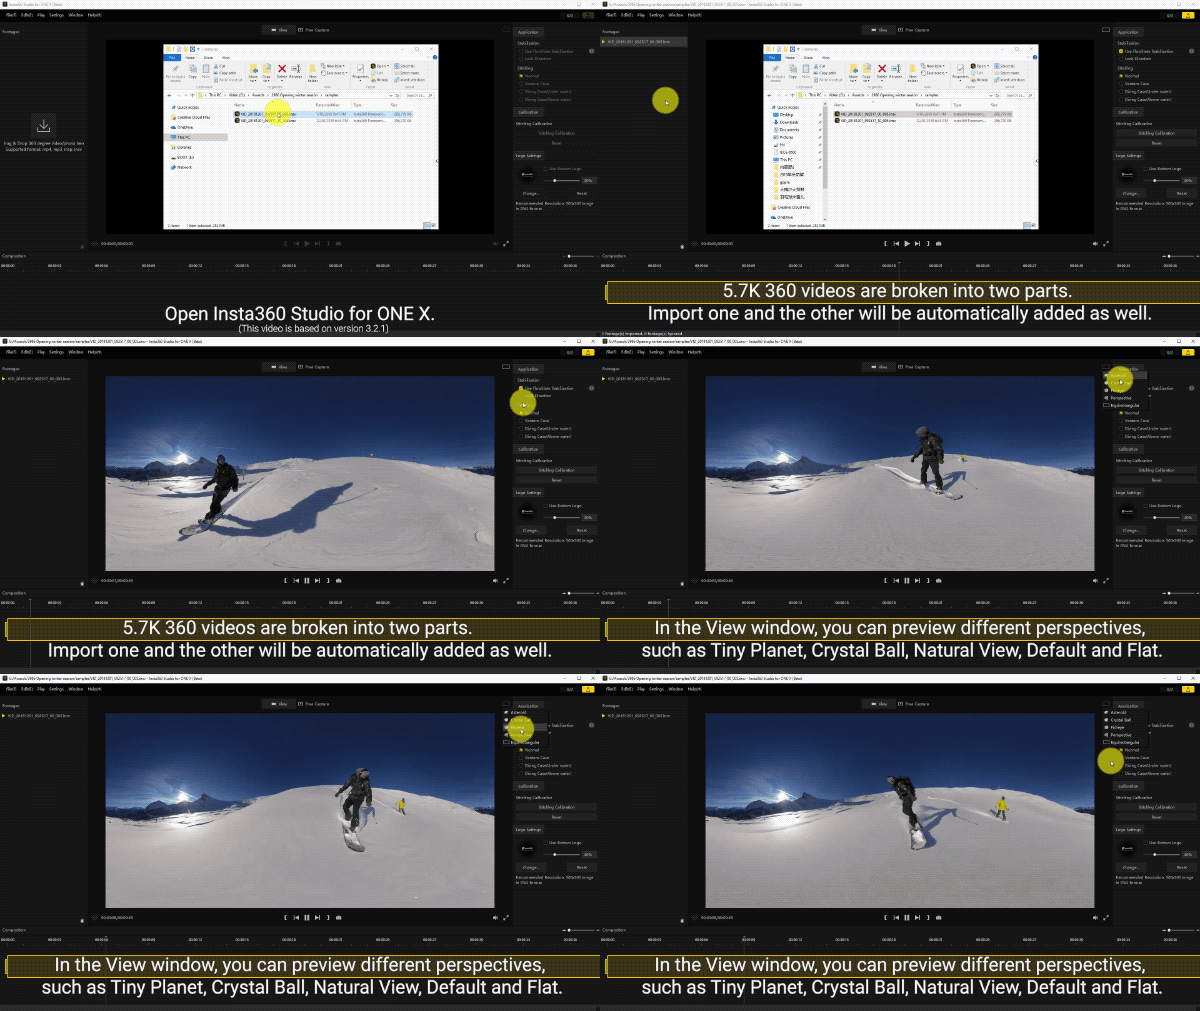
- Open Studio and drag insv files into studio, Click “Preview”at the the top to play them.
- In the View window, you can preview different perspectives such as Tiny Planets, Fisheye, CrystalBalls, Natural View and Flat.
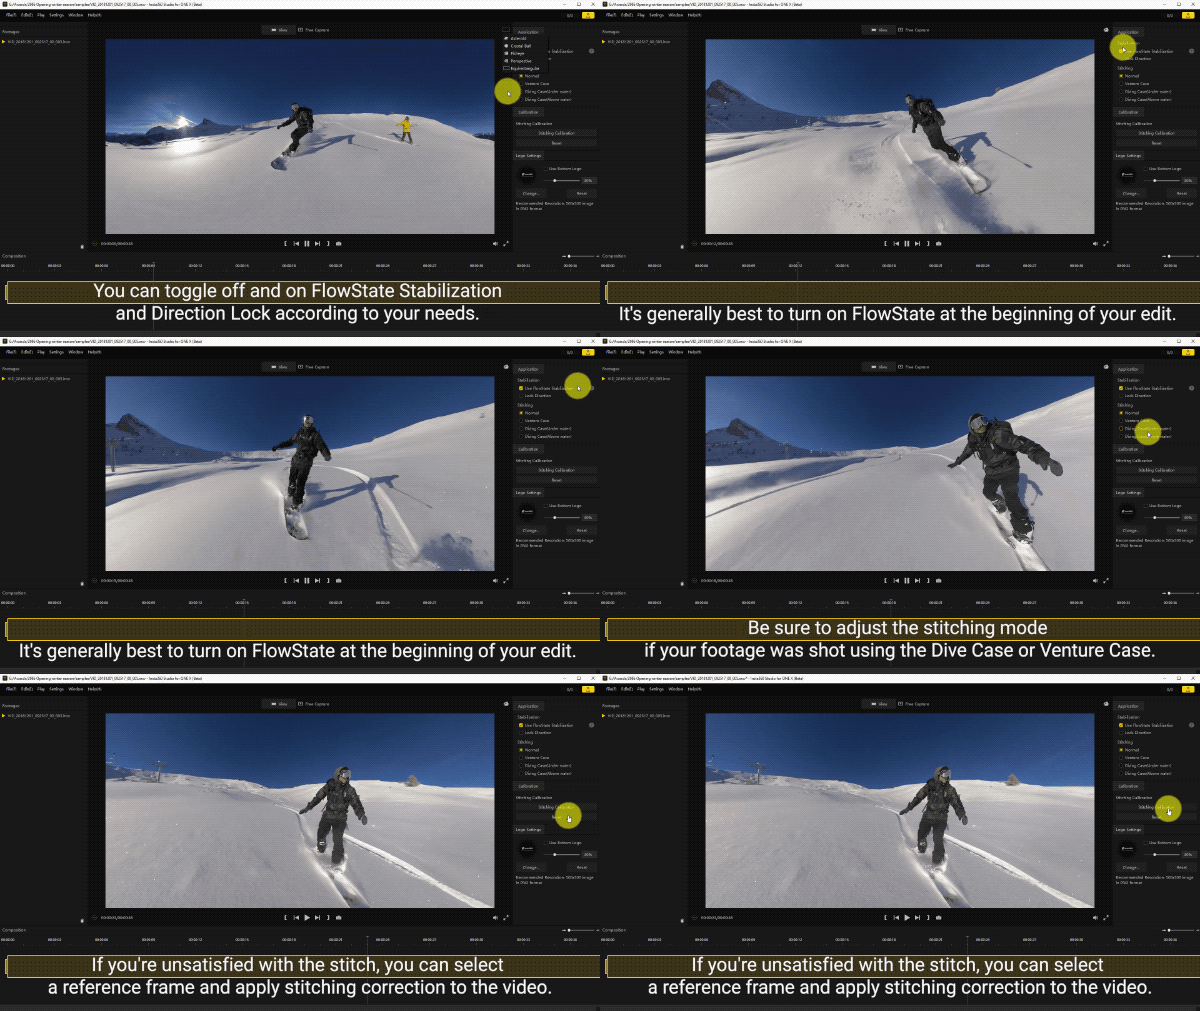
1.2 FlowState Stabilization and Stitching Calibration Settings
- FlowState is turned on by default so that it will be easier to set keyframes with FreeCapture later.
- If you’re unsatisfied with the stitch, you can select a reference frame to apply stitching calibration to the video.
- 2. FreeCapture
2.1 Determine your edit
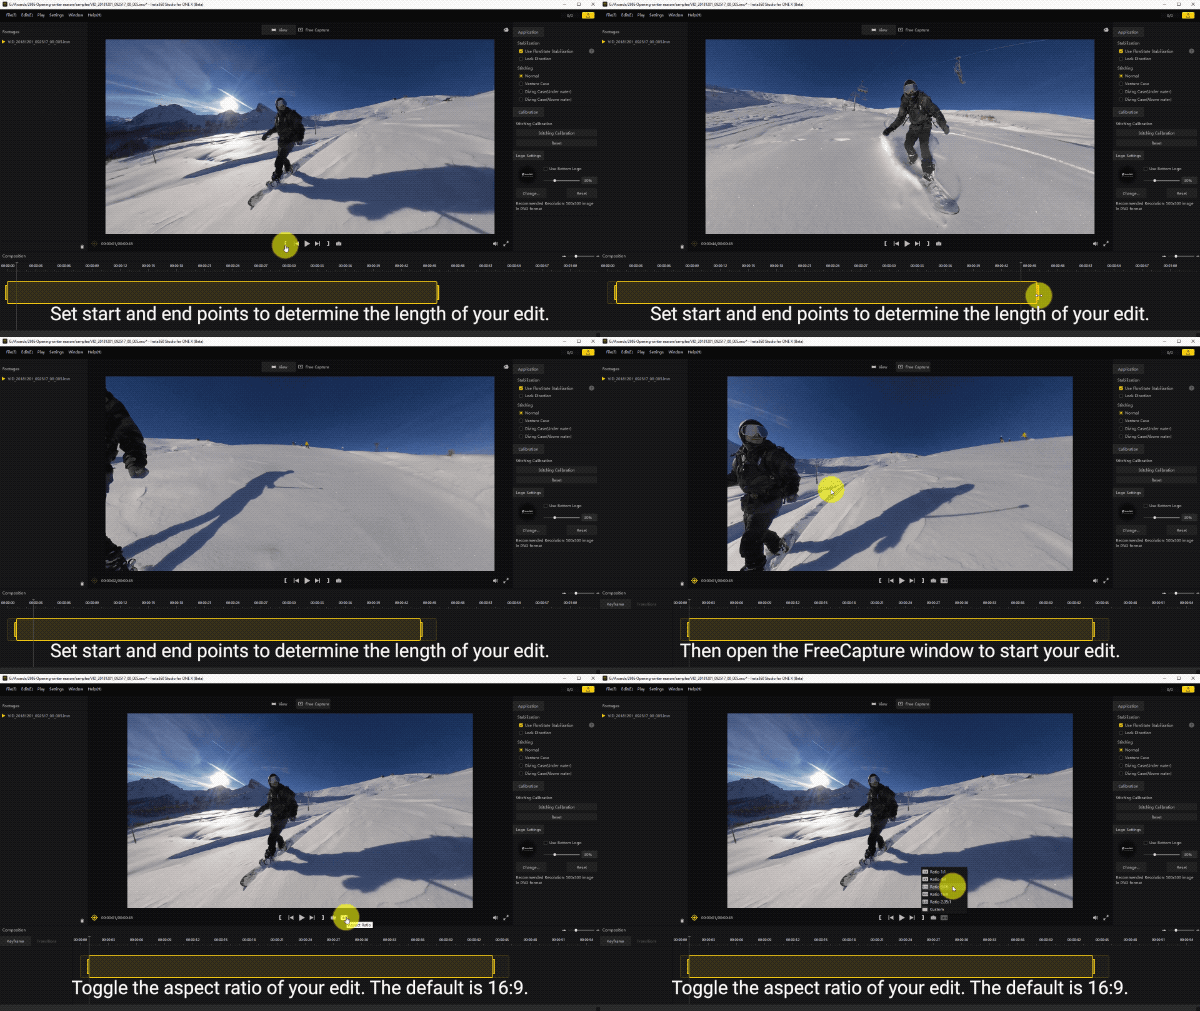
- Set start and end points of your video to determine the length of your edit.
- Click “FreeCapture”at the top to start your edit.
- Toggle the aspect ratio of your edit. The default is 16:9.
2.2 Add Keyframes
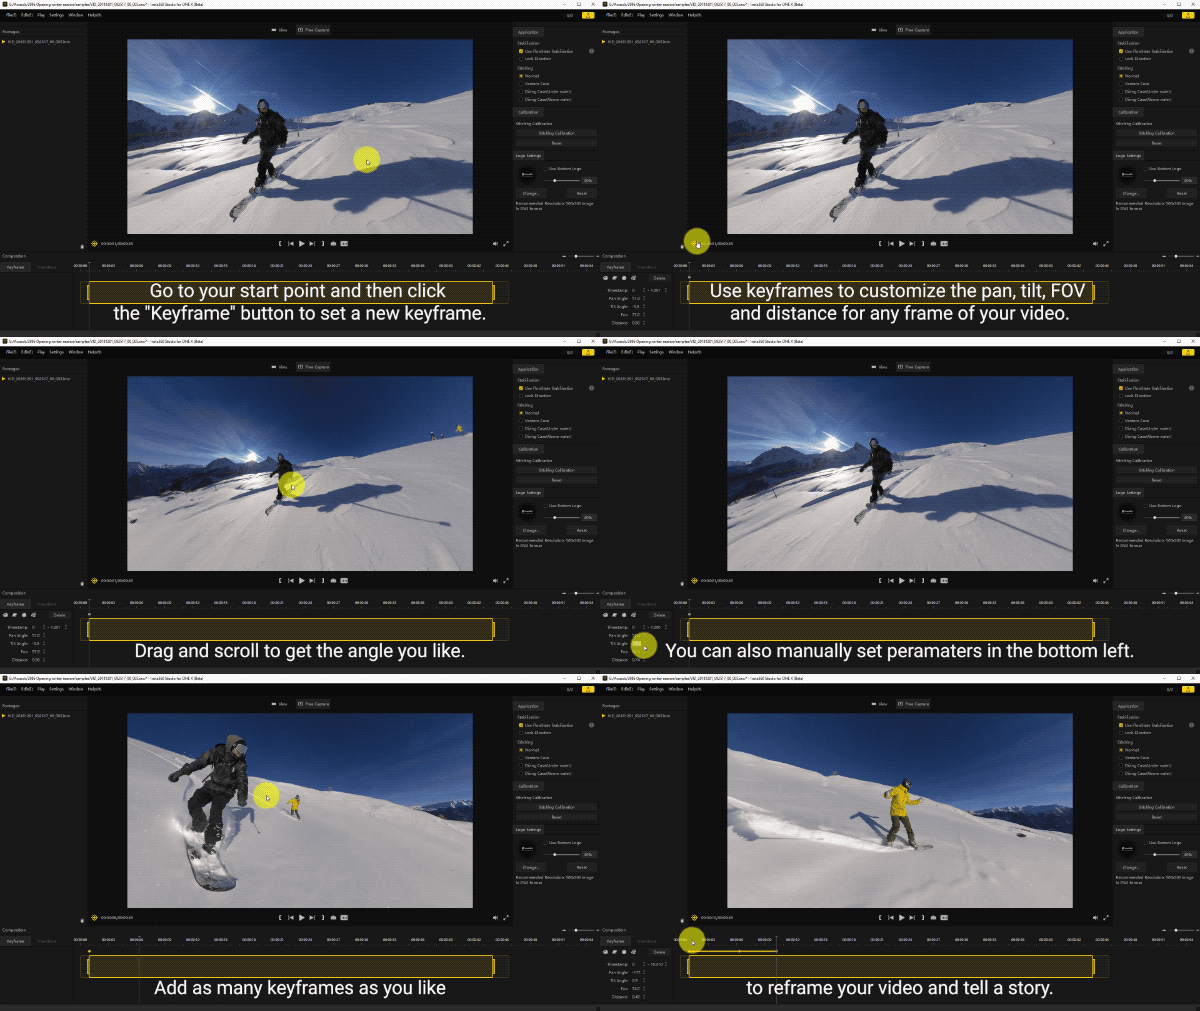
- Use keyframes to customize the pan, tilt, FOV and distance for any frame of your video. Drag and scroll to get the angle you like.
- You can also manually set parameters in the bottom left.
- Add as many keyframes as you like to reframe your video and tell a story.
2.3 Set transitions between keyframes
- Experiment with different effects on different frames. The default is Smooth Dissolve.
- You can also change the perspective here, such as a Tiny Planet.
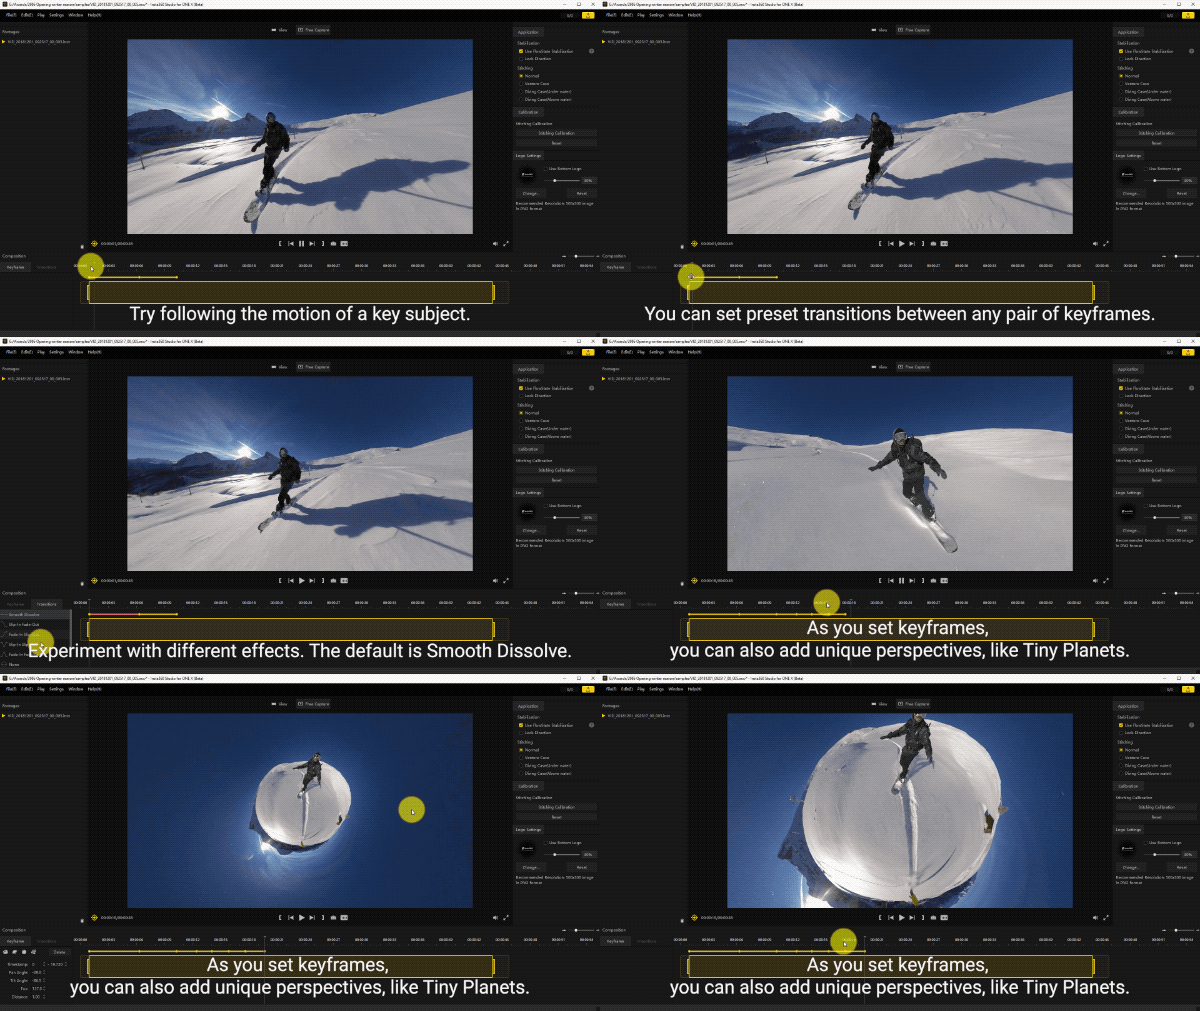
2.4 Modify Keyframes
- You can click to select any keyframe and drag it to different points on the timeline.
- Or click to select any keyframe and right-click to delete any keyframe.
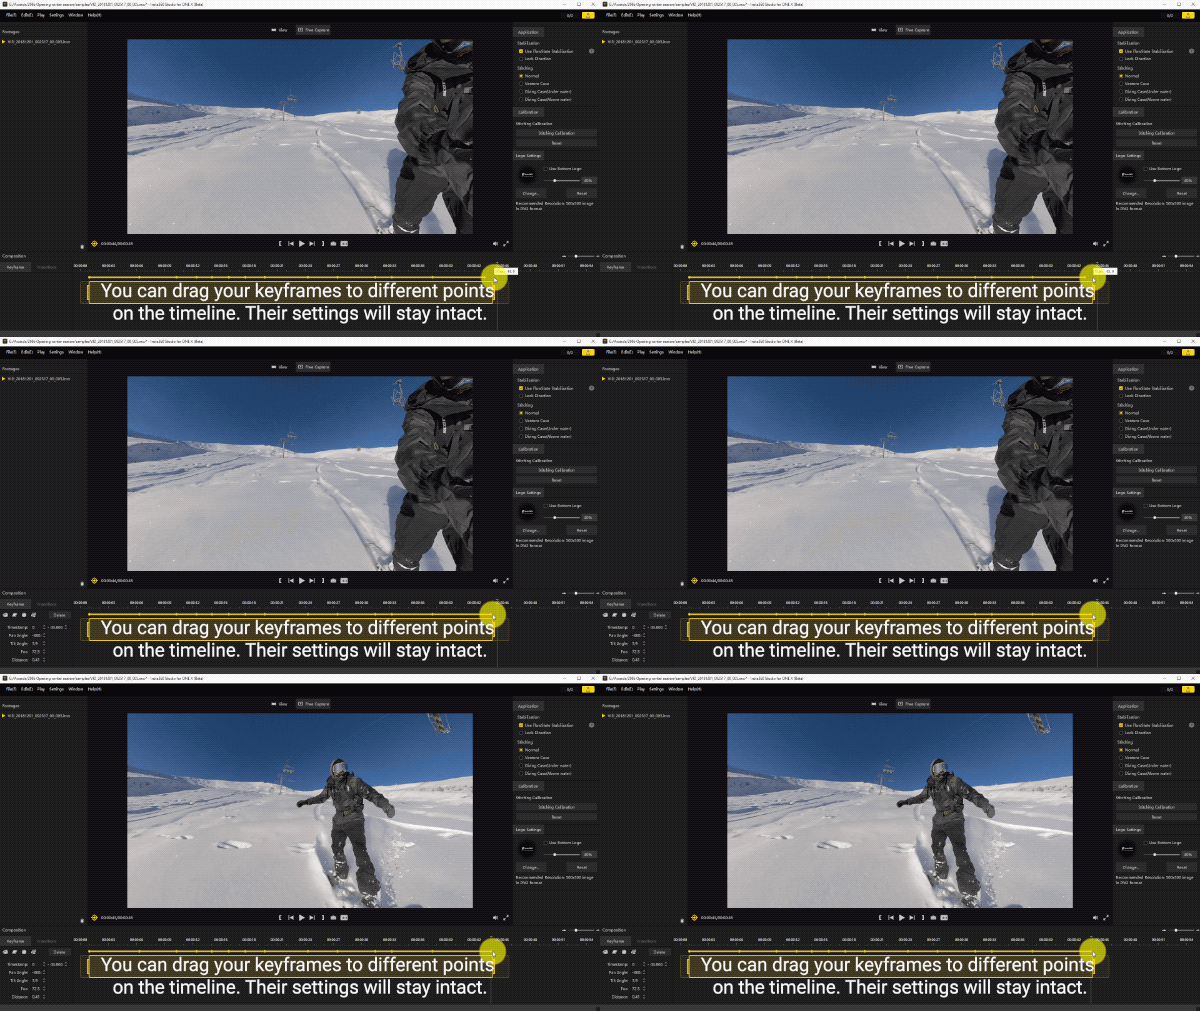
2.5 Render and export videos
- Before exporting the video, you can save the parameters of the edit so that it will be easier to modify them later.
- Close the task window and the rendering will run in the background.
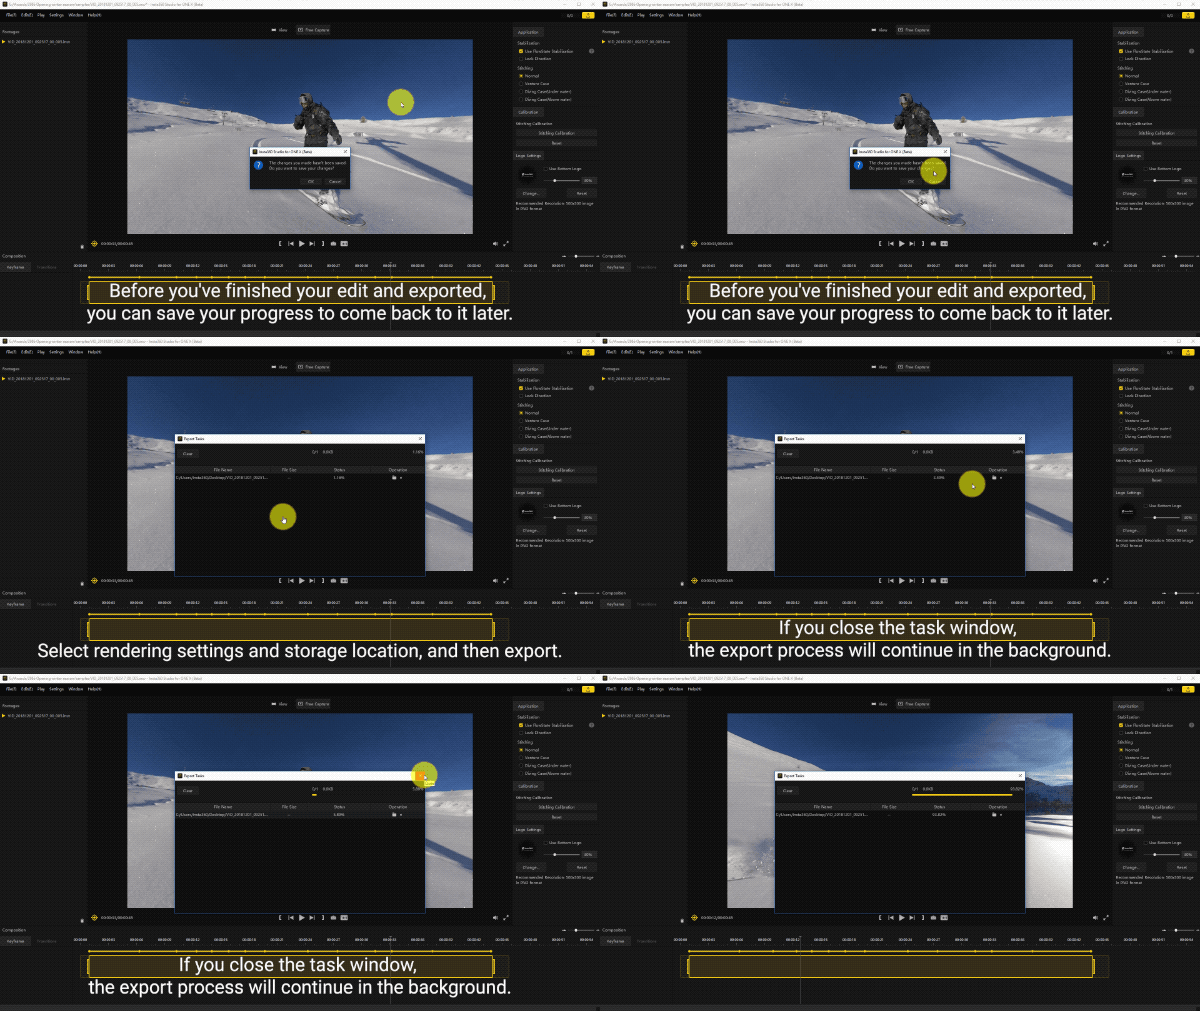
3. Edit Bullet Time Videos
- Set start and end points of your video.
- Toggle the aspect ratio of your edit.
- Adjust your field of view and set distance parameters. You can toggle the aspect ratio of your edit.
- Note:
- Bullet Time videos do not support FreeCapture. Make sure FlowState Stabilization is on.
- If your footage was shot using the Venture Case or Dive Case, choose the right stitching mode in the top right. If you’re unsatisfied with the stitch, you can select one reference frame to apply stitching calibration to the video.
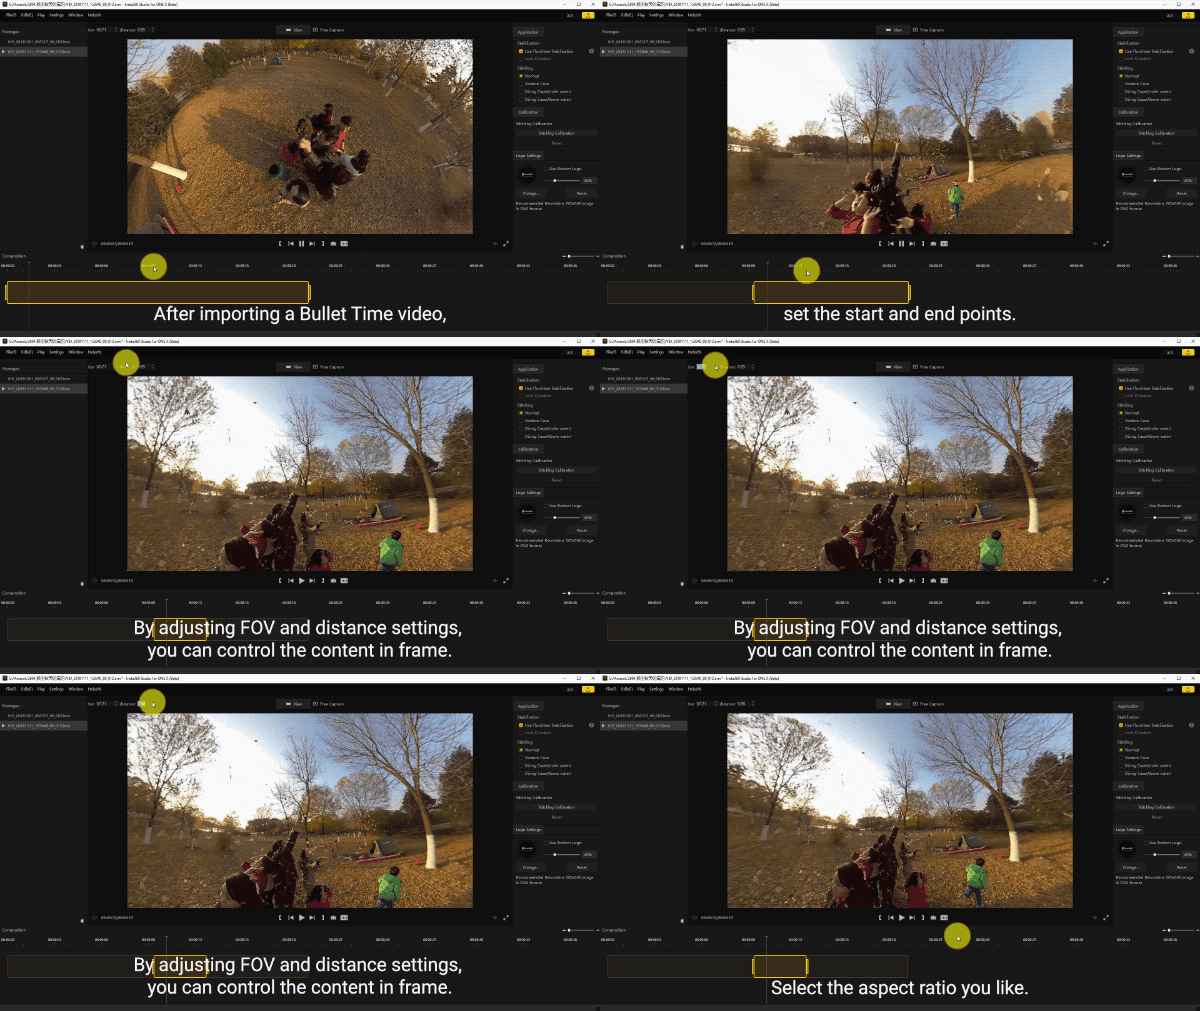
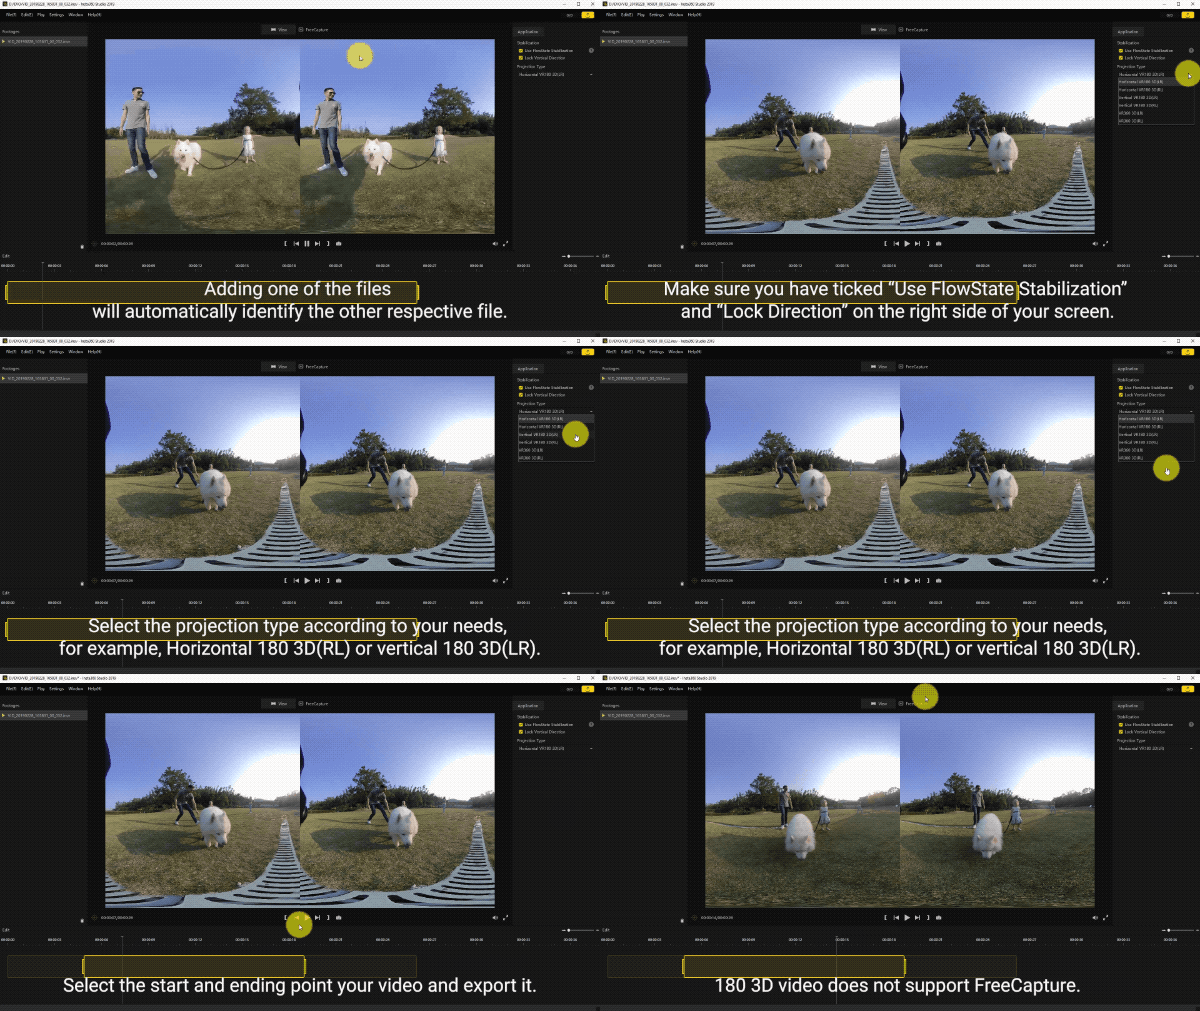
3. How to Preview 180° videos
- Open Studio 2019, drag your file into the media list and click on the preview button.
- When exporting your video, make sure you have selected“Use FlowState Stabilization” and “Lock Direction” on the right side of your screen.
- Select the projection type according to your needs. The default is horizontal VR150 3D (LR).
- Note: Only Insta360 EVO can capture 180 3D videos and pictures.
4. Tips:
- 1. You can now apply FreeCapture to Mp4 videos after stitching.
- 2. FlowState Stablization is checked and turned on by default. You can modify it according to your needs. After applying any FreeCapture, please do not modify the FlowState settings to prevent data corruption of your recording.

Was this information helpful?
Yes
No

Questions about products?
Chat with us now

